Thursday, April 11, 2013

The Legion of Doom

Been quite awhile since I posted and felt it was time to make an update. Over the past few months the group has moved through several different games, but right now Blood Bowl is the star of the show. With the new league I finally got around to getting a Chaos team together. Unfortunately my inexperience with the game means that I suck, so haven't won a game yet and thus my team has relatively few skills at present. We've lost 2-1 and 2-0 to Orcs and Amazons respectively, but I've grown accustomed to the fickle dice and learned to love it.

On a whim I decided to name my team the Legion of Doom, complete with red spikey shoulder pads and facepaint. I've assembled the team solely from Warhammer plastic kits and green stuff, as I really don't like the Blood Bowl models one bit (especially since they are metal).

So below are pictures of the first few painted team members; Hawk, the first member to get a skill upgrade (Dodge), 2 other Beastmen who have yet to be named, my Chaos Warriors Captain Grip (with Block), and Animal the Minotaur (who isn't actually on the team yet).


Friday, October 19, 2012

Purple Legion

With the release of the new Chaos Codex I, like so many others, have found an opportunity to get out all the old Chaos models and jump back on the wagon. Though my last Chaos army was Thousand Sons, it seems the Codex hasn't changed their lack of viability in this edition. So I'm onto another god now, that god being Slaanesh.

When it came to viewing the Codex for the first time and thinking about different lists, I was torn between a few Slaanesh builds, and an Abaddon led list for lots of Prefered Enemy Space Marine shooty goodness. Regardless of the case, I wasn't going to paint a black army, and so decided to meld the ideas model wise so I could play either list, and so the Purple Legion was born.

I'm not a fan of pink, and I'm sick of painting gold, so I went for a purple and silver colour scheme, with yellows and greens to contrast to the purple. It's a lot different from painting Grey Knights or even White Scars (which are now on hold) and a hell of a lot more fun. I've been trucking through the work bit by bit, and will leave a sample at the end of this post.

As for the gaming side of things, for now I am starting with the Slaanesh build over the Abaddon build. Unsurprisingly it will be all-comers, though it will be some time before I use it at a tournament. Though Slaanesh in lead and models, most of the units will be unmarked, as in the edition of shooting I don't see myself getting too much use out of I5 on the units.

Chaos Lord
Mark of Slaanesh, Steed of Slaanesh, Power Weapon, Sigil of Corruption, Veteran of the Long War, Burning Brand of Skalathrax


5x Noise Marines
4x Sonic Blasters, Doom Siren, in Transport 1

10x Chaos Space Marines
2x Meltaguns, in Transport 2

10x Chaos Space Marines
2x Plasma Guns, in Transport 3

20x Cultists
18x Autoguns, 2x Heavy Stubbers

20x Cultists
2x Flamers


6x Chaos Bikers
Mark of Slaanesh, Icon of Excess, Veterans of the Long War, Power Weapon, 2x Meltaguns

Heldrake
Baleflamer

Heldrake
Baleflamer


5x Havocs
4x Autocannons

5x Havocs
4x Autocannons


Aegis Defence Line
Quad Gun


Transport 1: Rhino with Dirge Caster
Transport 2: Rhino with Dirge Caster
Transport 3: Rhino

It's a pretty basic list with no tricks or subtleties, but I reckon it will be effective. The Lord joins the Bikes, giving them the option to Outflank, though they will deploy in most situations. They form the biggest force in the army, with powerful shooting and good close combat ability while being tough as nails to boot. Dirge Casters on the advancing Rhinos will help with any charges they feel they make also.

The Noise Marine squad is more an experiment in trying to see their effectiveness in a role other than the obvious static supression unit. The unit is cheap, and can clear out any foxholes fairly easily. I reckon with so few bodies and so many other bigger threats they should able to cross the board ok, and if not, it isn't the biggest loss.

Aegis Line is very important in this list IMO. It gives the Havocs that extra pop against flyers, and gives the Cultists a perfect place to hide and hold an objective. The Melta CSM squad is more or less made to advance while the Autogun Cultists are more or less made to stay behind, while the other two Troop units are versatile enough to do either.

Heldrakes give important anti-MEQ (and a little umph to the army's AA options) and when combined with the Lord allow the army to fry Marines from a distance with excellent effect.

And it is all led by this guy below; comments and criticisms welcome. Cheers.


Wednesday, September 26, 2012

NWG 2012 - Game 4 and Conclusion

So coming into the last game of the tournament I was on 40pts, which was acceptable on 3 games only, and given the scores of the other top players, I might still be able to break podium if I play a solid last game, depending on the results of some other games of course. For this last trial I was paired up with Brian Stack and his Space Wolves. He had a slightly different list to the norm, but it was pretty solid. The last mission was Annihilation with a Pitched Battle deployment. For secondary I got Breakthrough, which meant I had to move a scoring unit off of Brian's table edge. Of course given that that unit is then out of the game I had to do this right, so that would take some planning, or so I thought. Can't remember Brian's secondary, but his list can be seen roughly below.


Rune Priest
Divination

Wolf Priest
Terminator Armour


5x Wolf Guard
Terminator Armour, 2x Storm Shields, Chain Fist, Assault Cannon, 2x Wolf Claws, in Transport 1


8x Grey Hunters
Arjac Rockfist, Wolf Standard, Meltagun, in Transport 2

10x Grey Hunters
2x Plasma Guns, in Transport 3

5x Grey Hunters
Wolf Guard with Power Fist and Combi-Melta, Meltagun, in Transport 4


6x Long Fangs
3x Missile Launchers, 2x Lascannons

6x Long Fangs
3x Missile Launchers, 2x Plasma Cannons


Transport 1: Land Raider Crusader with Multi-Melta
Transport 2: Drop Pod
Transport 3: Rhino
Transport 4: Razorback


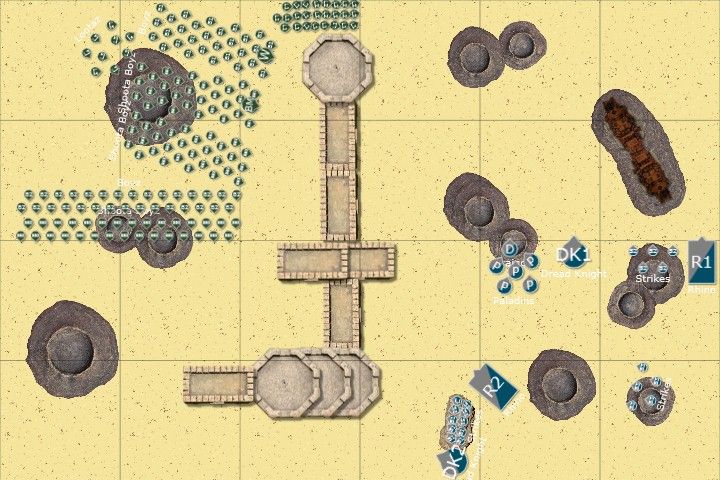
I'm a litte sketchy on the specifics as it has been awhile now since the tournament, particularly when it comes to the Wolf Guard. But I think I got it right. The Wolf Priest was his Warlord but I can't remember either of our traits. For powers he got Prescience and I think Scrier's Gaze. I got Prescience and the overwatch one. Brian won the roll-off for sides and so would be getting Arjac's boys donw without Warp Quake up more than likely. He deployed everything while I had just the Ravens in reserve. For Grand Strategy I gave both Dreadknights and the Paladins re-roll 1's to wound.

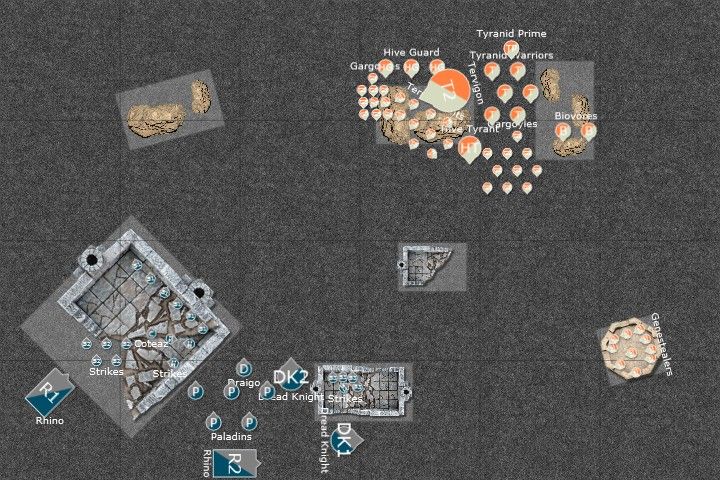
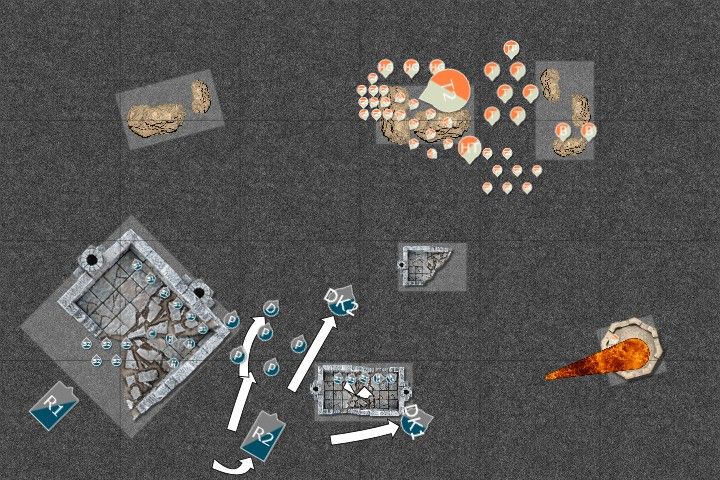
Regarding the deployment diagram below; the Wolves look like a mess. There was a multi-storey ruin, and he has threes units in there, one on top of the other, which is hard to see in the diagrams.
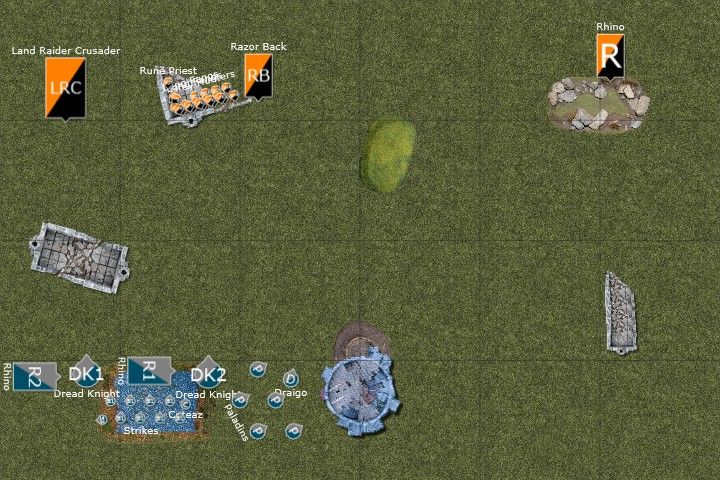


Turn 1

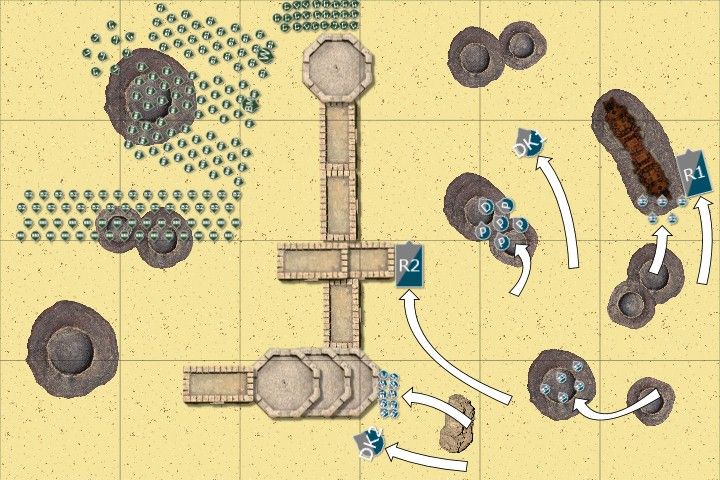
I attempted to sieze but failed even on the re-roll. Arjac's Drop Pod landed right next to Draigo and his boys, who were ready for a fight. The Crusader moved up to the ruins also. The Rune Priest has put up Prescience on the ML/LC Long Fangs, and they were the first to fire, doing a wound to Dreadknight 2. The other squad fired at Dreadknight 1, and they also did a wound. The Crusader opened on Dreadknight 1 also but covered saved him from any damage, and Arjac's unit pumped shots into Draigo's unit, but thankfully I'd place Draigo so he was the closest no matter where the Pod landed, so he shrugged off the damage.
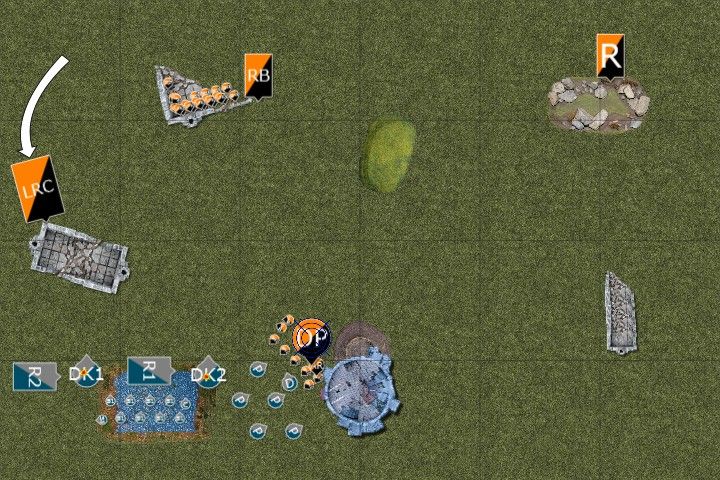


In my turn Coteaz cast Prescience on the Paladins and then led the advance, or maybe not as he only rolled snake eyes for his terrain roll. The Rhinos and Knights moved up quickly though and the other Strike Sqaud disembarked. Draigo and his boys moved around Arjac's unit. In shooting the Strikes fired at the Land Raider but failed to hurt it. The Dreadknights were just able to clip two Long Fangs, killing them both on the second attempt. The Paladins shot at Arjac's unit, killing two, and then charging in. Arjac issued a challenge and a hammer accepted. Draigo and the other Paladins wiped the Grey Hunters, but Arjac survived on a wound and stayed put while killing the Paladin he was duelling.
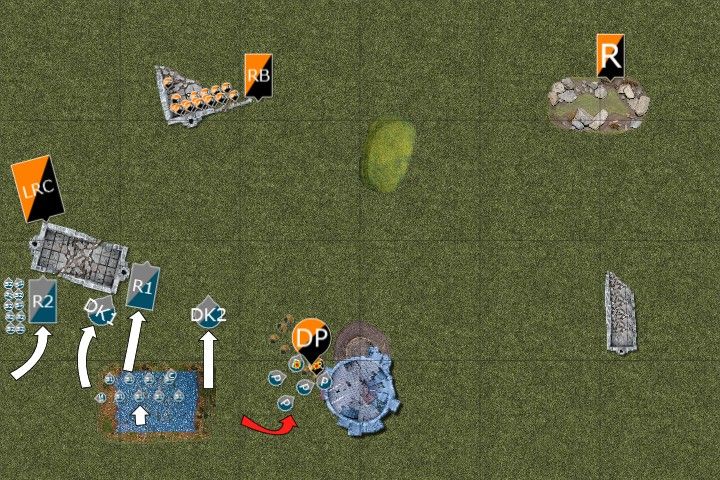


Turn 2

To start the turn the Crusader moved into the ruins and immobolized itself. The cargo inside got out and prepared. Prescience went up on the same Long Fangs again, and then everything started shooting. The other Long Fang unit started by shooting Dreadknight 2 and killing him with aid from the Razorback. The Prescienced Long Fangs then split fire, putting both Lascannons into the Rhino and the Missiles into Coteaz unit. The Rhino lost two Hull Points. Coteaz sqaud lost only one man. The Wolf Guard and Wolf Priest opened up on Dreadknight 1and killed him, while the Crusader killed the two Psycannons from the Strike squad. In combat Arjac challenged again and the second hammer stepped up, dying once again, but killing Arjac in the process.
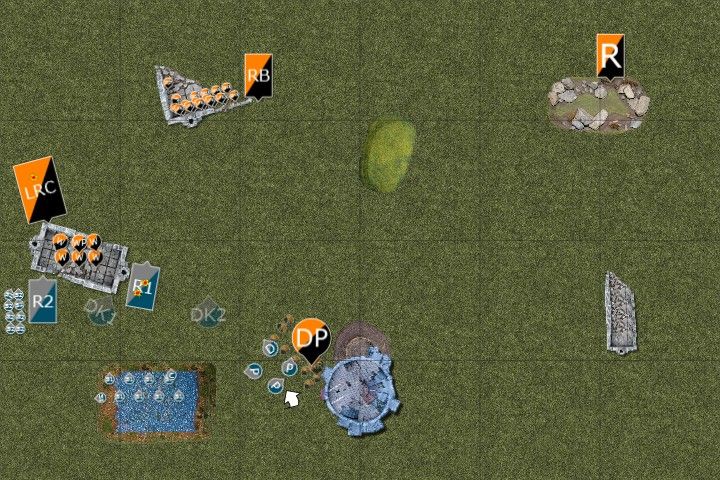


Inmy turn both Ravens came on, one going for the Land Raider and the other going after the Long Fangs. Draigo and his squad advanced while both Rhinos retreated, one Immobolizing itself in the water. Coteaz puts up both powers on the 8 man Strike Sqaud, who advanced for LOS. They then shot at the Wolf Guard, killing two. The Raven next to them did the same but used the Machine Spirit to fire the Multi-Melta at the Land Raider instead; it killed a Wolf Guard and blew up the Land Raider. The rest fired at the Long Fangs, killing some, with both Mindstrikes missing the Rune Priest.
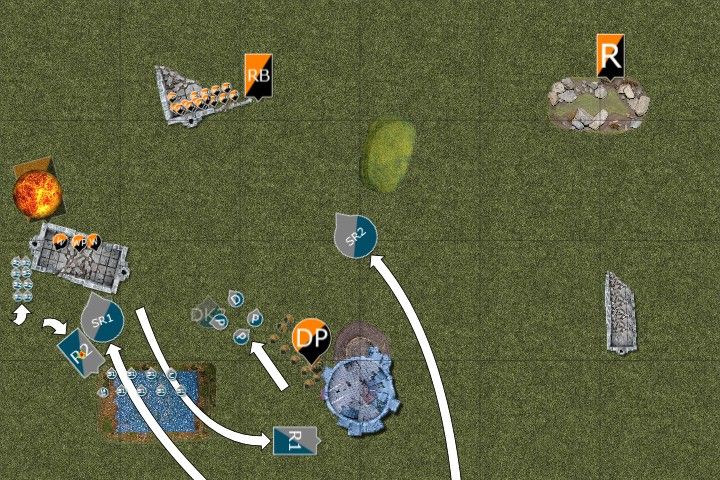


Turn 3

The Rune Priest repeated his casting pattern as the Razorback and Wolf Guard advanced. The Prescienced Long Fangs managed to Stun the Storm Raven on front of them. The rest of the shooting from that side went into Draigo, who tanked it all bar a single split fire Missile which took out the fleeing Rhino. Between shooting and a charge the Wolf Guard killed all but two Strikes who fled, but not before killing the remaining Wolf Guard, leaving the Priest on his own.
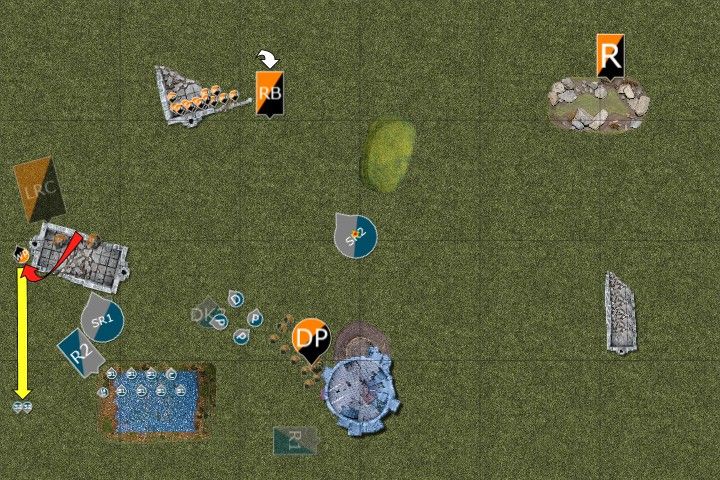


I passed my Fortitude test with the Raven but the Rune Priest stopped it, meaning the Raven has to move exactly 18" straight forward this turn. It ended up exactly an inch on front of the ruins, and I left a sigh of relief. The other one flew over to join it. Coteaz repeated his castings from last turn and advanced. The two Strikes rallied and moved on the Wolf Priest as Draigo continued his advance. This time the Ravens were more fortunate with the missiles, killing the Priest, and also his unit of Long Fangs. All other shooting failed to kill though.
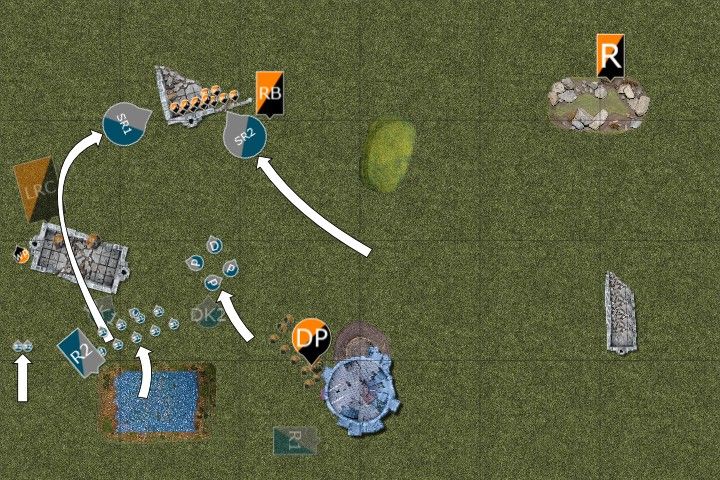


Turn 4

The Space Wolves were quickly running out of options. The last unit of Grey Hunter disembarked from the Razorback, and the Wolf Priest went for another go at the two remaining Strikes. Long Fang shooting saw a few members of Coteaz sqaud go down, while the rest focused on the Ravens to no avail. The Wolf Priest charged and fought to a stalemate.
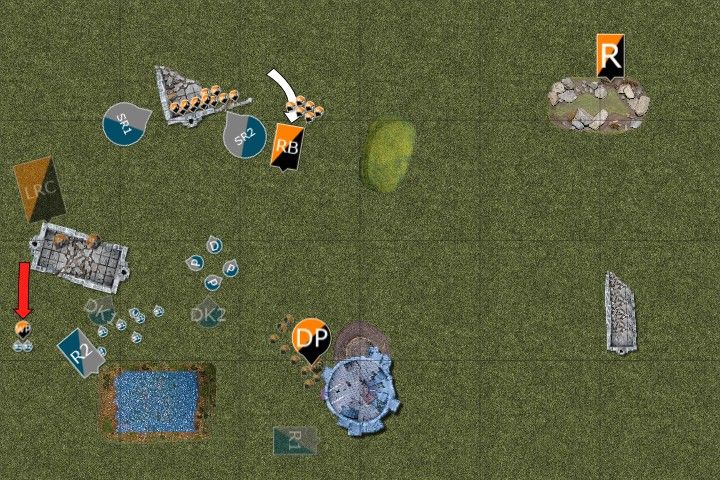


Coteaz put up Prescience on his own unit and moved to charge the Priest. Raven 1 moved on the Rhino that had been hiding on the flank for the whole game, while the other dropped to hover mode and back up enough to not have to worry about assault. Draigo and his squad advanced, ready to strike this turn. Both Ravens proved dead on the money this turn, collectively destroying the Rhino, destroying the gun on the Razorback, and killing 3 Long Fangs, forcing the last to run away. Coteaz squad charged the Wolf Priest who took a wound but held. Draigo on the other hand charged in and watched two Plasma Gunners kill themselves, before taking a wound, and then annihilating the squad.
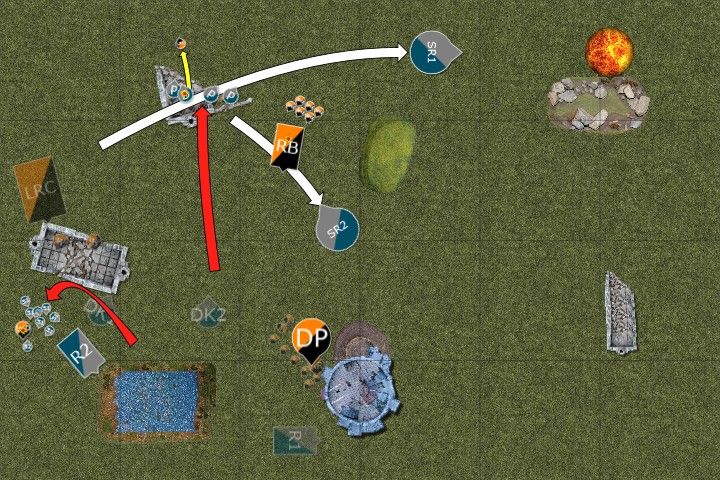


Turn 5

With nothing left and realising my secondary, Brian moved his remaining men to try and shoot down the Paladins; they did a wound but that was it. The Wolf Priest finally died.
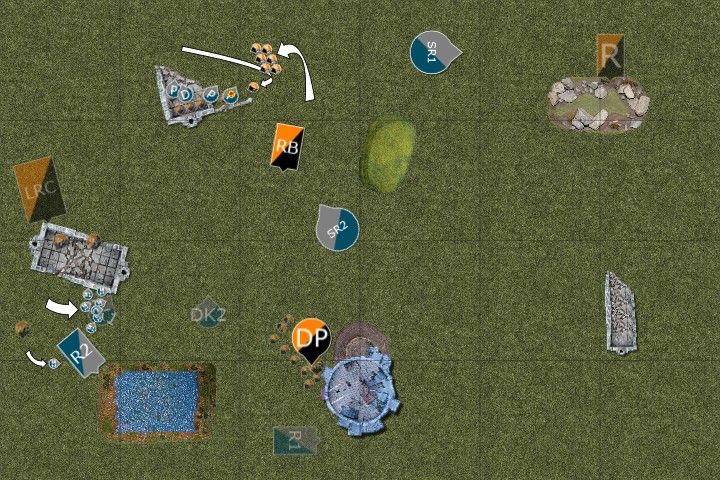


The Ravens moved back to finish off the job, while Draigo and his men made a break for it. Coteaz and his sqaud moved out and the lone Hammer from the other squad got into the Rhino for safety. Coteaz squad blew up the Drop Pod while the Ravens killed the last Long Fang and the Razorback. Draigo ran, but only got an inch.
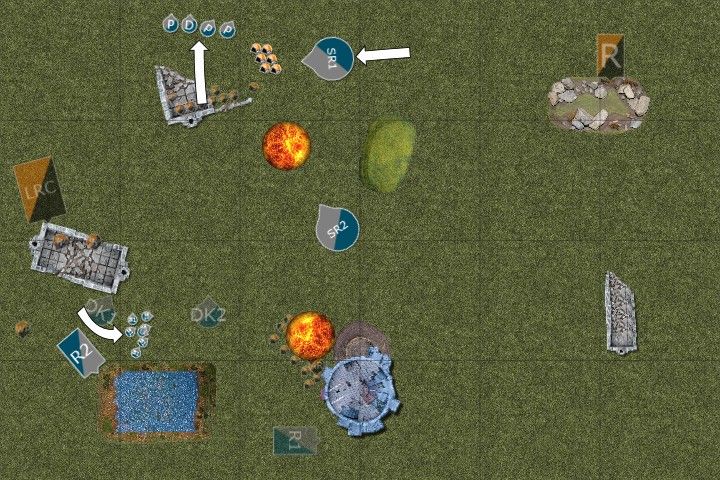


The roll would decide a lot as if the game ended I'd win but without secondary it wouldn't be enough.


Turn 6

Thankfully for me the game continued. The Grey Hunter tried to stop Draigo again but only killed a Paladin. Then the Storm Raven came in and finished them off while Draigo and co' left the table.
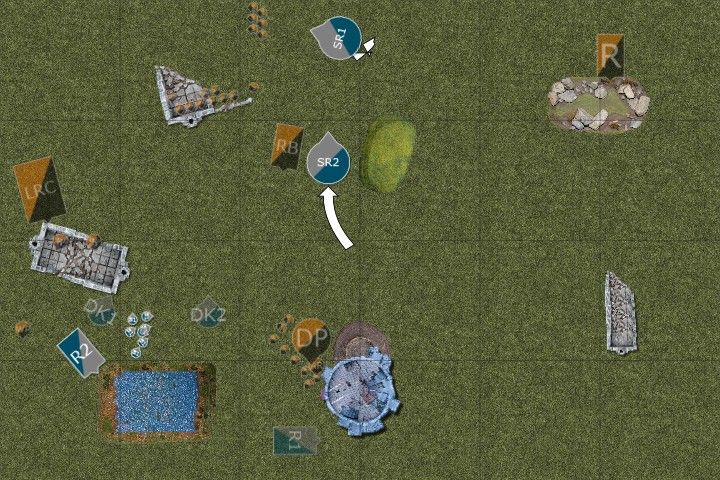


Conclusions

Well I'm relieved. I thought the Prescienced Long Fangs might do a bit more to my Ravens but it was not to be. Those single MM shots worked wonders too. I don't think I made any mistakes in this game, except perhaps a few turns of shooting rather than running with Draigo; that nearly cost me secondary there at the end. First game where the Dreadknights didn't kill loads of things, but they did soak up an unmerciful amount of firepower instead. In the end I won primary by a mile, secondary, and VPs by a mile, netting me a third 20-0 victory.

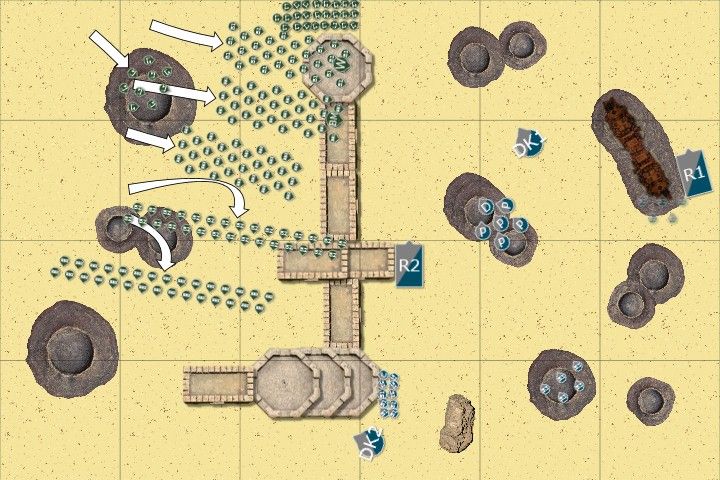
Below is two pictures from the game as well, just for fun, taken by God-know-who.


And so that was it for my NWG 2012 experience. It was a wild weekend to say the least, and to say I was pleased with 60 points after only getting to play 3 games is an understatement. That feeling was to improve also when I was awarded the Best Painted award, topped off by finding out I managed 4th place. Dark Harlistar army came 1st, followed by a Blood Angels/Armoured Tank Company alliance in 2nd, and then the Orks I played in the second last round in 3rd and only 1 point higher than me. So close to podium, but ah well, I will certainly not complain about the outcome, especially given the circumstances.

So that was that, I will definitely be back next year, though after the new FAQs I reckon Draigo will be on the shelf for now. It's onto Moocon 6 next with Purifiers replacing the Paladins. See you then.

Wednesday, September 19, 2012

NWG - Game 3

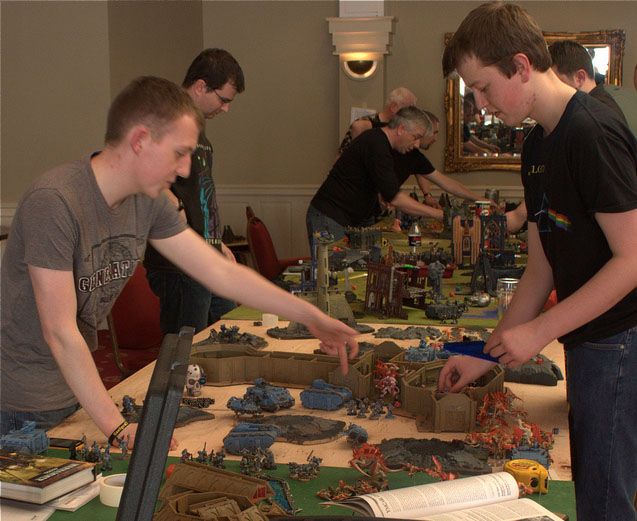
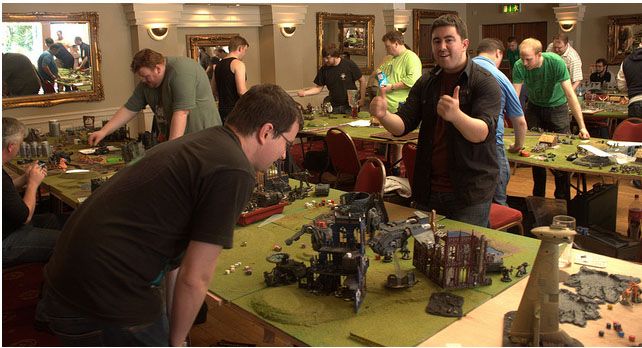
After a surprisingly short night, I was easily up bright and early for a shower, breakfast, and round 4. As I stated in the last report I was set to face Jan Karnowski and his Ork horde. Jan has being having success with this army even going way back into 5th edition, and I knew this one would be tough. I did have a lot of templates and blasts however, so I thought I might be able to get a handle on it, then I saw the table I was playing on. Below is a picture someone took during round 5. The table in the foreground, with the Nids and Wolves playing on it, is my round 4 table. As you can see, there's a massive piece of terrain pretty much disecting the board, and it just happens to block LOS of just about everything. In other words, those Orks would be unmolested until they were in my face pretty much. Funnily enough, that's me behind the guy on the right in the picture, playing on the table next to it.


Below is also a rough look at Jan's list.


Warboss
Mega Armour, Cybork Body, Power Claw

Big Mek
Kustom Force Field


15x Lootas
10x Lootas
9x Lootas


30x Slugga Boyz

Nob with Power Claw and Bosspole

30x Slugga Boyz
Nob with Power Claw and Bosspole

30x Shoota Boyz
3x Rokkit Launchas, Nob with Power Claw and Bosspole

30x Shoota Boyz
3x Rokkit Launchas, Nob with Power Claw and Bosspole

30x Shoota Boyz
3x Rokkit Launchas, Nob with Power Claw and Bosspole

10x Grots
Runtherder with Bosspole


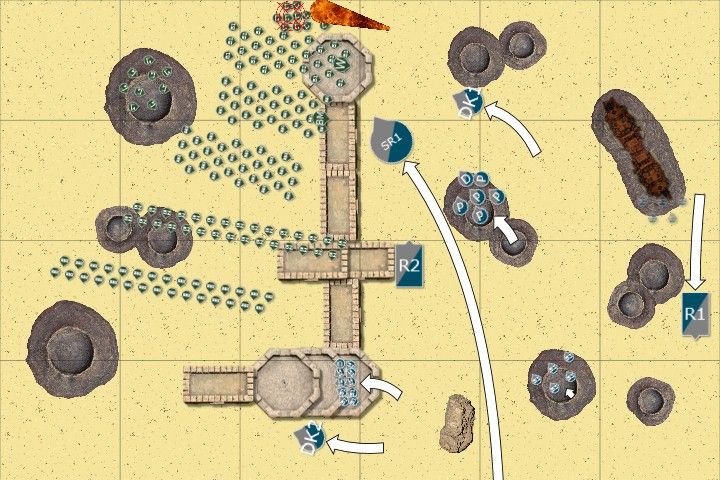
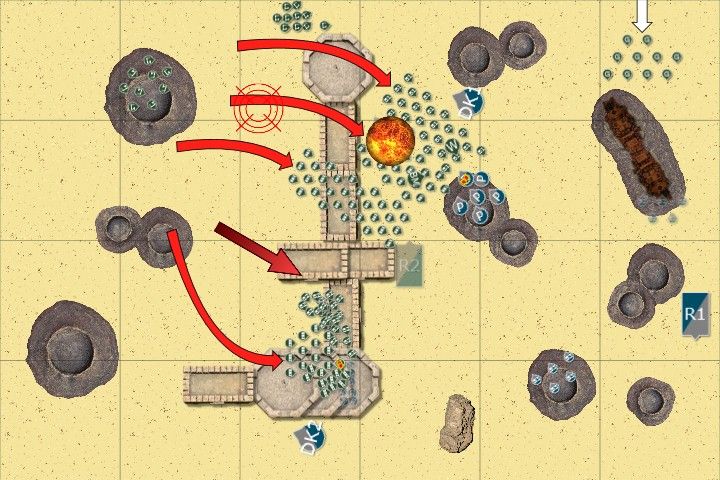
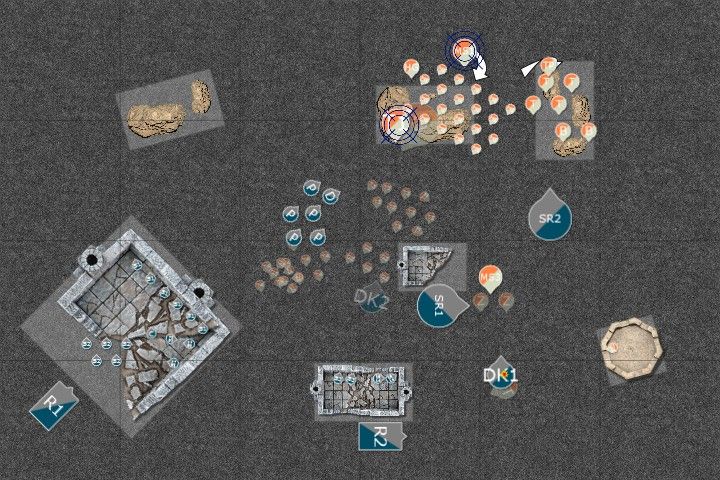
No subtly, just Orks, lots and lots of Orks. For this game we were playing the Sieze Ground scenario once again with a Spearhead deployment. I got a lucky start being able to deploy and go first, giving me a chance to get the quarter with most of the objectives, allowing me to play a holding game if at all possible. I got the Master of Ruins trait though, while Jan got the extra Run dice within 12" of his Warboss. Coteaz rolled up Prescience and Misfortune for this game. I deployed spread out to try and sweep the objectives quick so I could then brace for impact; only the Ravens were in reserve. The Orks horded around their objectives mostly, with the Lootas going as far North East as they could to get LOS; the Grots stayed in reserve. We both got Attrition as our secondary BTW, and Draigo made Dreadknight 1 scoring with Grand Strategy.


Turn 1

I began as planned, sweeping out to capture objectives. As the huge ruin in the middle was all one big objective it was very important to get into it first. Pretty much everything ran as there was no shooting to be had and it was over to the Orks.


The Orks all surged forward as was to be expected. They ran, most of them benefitting from the Warlord Trait, while the 15 and 10 man Loota squads combined to wipe out a combat squad.


Turn 2

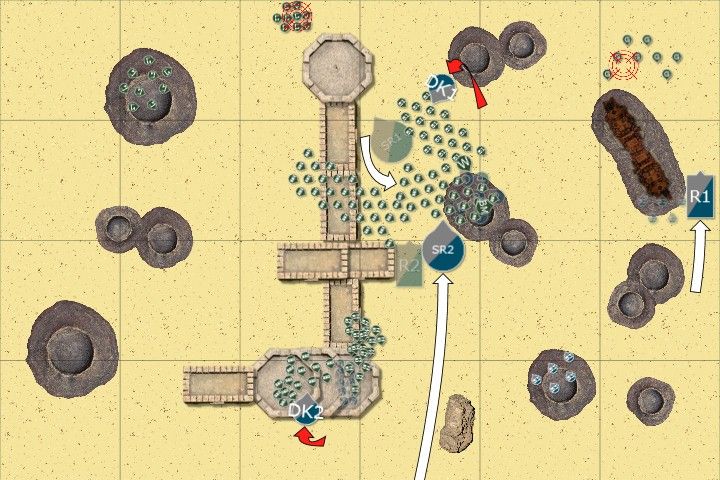
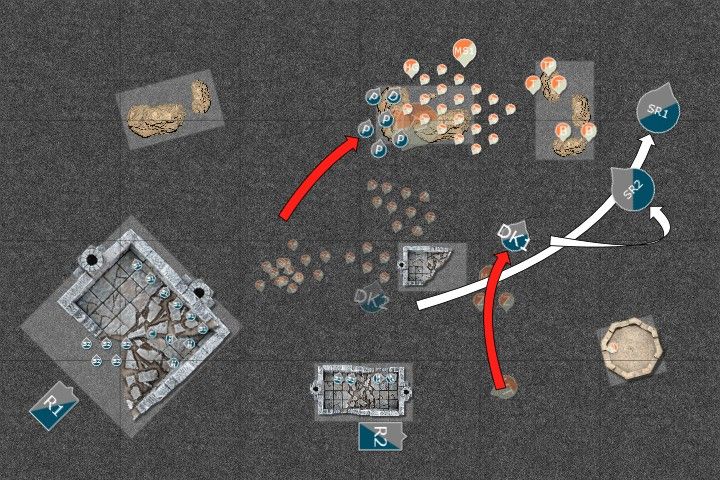
Coteaz put up Prescience just incase as one Raven came in, gunning for the Lootas. The Rhino in the East moved back, as its cargo were now dead. Coteaz got his squad into the ruins proper and shot 4 Orks dead. The Dreadknight up North fried 9 Lootas, 7 from the 10 man squad and 2 from the 15, with the rest of the 10 man fleeing the board. The Raven fired all it could at the 15 man squad, and despite doing 8 wounds, they passed 5 cover saves, meaning they stayed Fearless.


The Grots entered the fray in the North East corner, as all the Boyz geared up to charge. Jan enthusiastically called the Waaaggh! and the Boyz began to move. Both Loota Sqauds combined to blow up the Raven, the debree falling into the Mob, but killing none as they passed their cover saves. Other shooting did nothing and then charges were declared. The shortest charge to be made was 8", but all 5 units made it thanks to Waaaggh! re-rolls; both Slugga units hit Draigo, while the Shootas hit Coteaz with 2 units while the last hit a Rhino.

Combat was bloody, with masses of Orks and a unit of Strikes being killed, while Coteaz and Draigo both took 2 wounds each.

Just to note, at this point I was up 7-2 on primary.


Turn 3

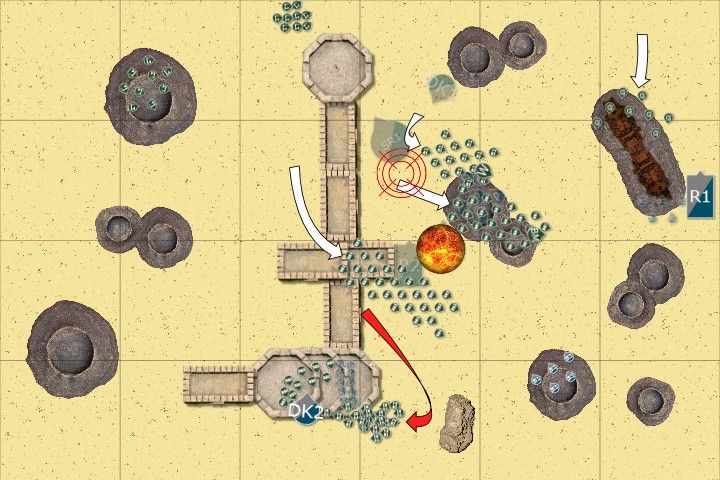
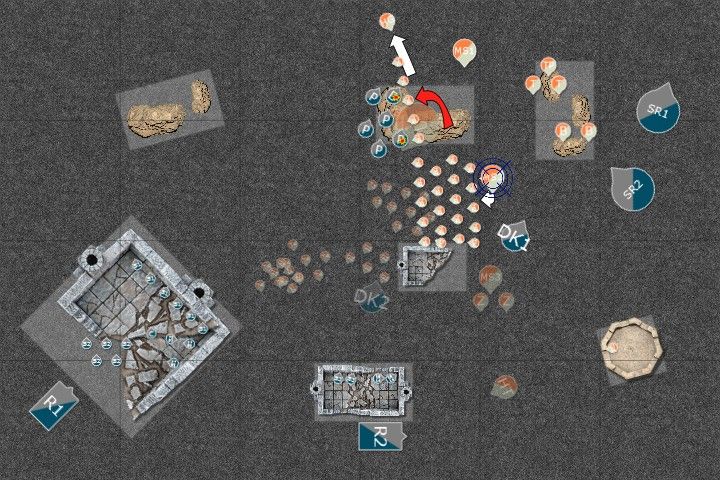
As a display of the dire situation Coteaz as blindly casting his powers in hopes that he would Perils and die so that the Dreadknight could flame the tightly bunched up Orks. The other Raven came on and landed in mid-field. The Rhino turned back to try and stop the Grots. Both Dreadknights prepared to assault, the scoring one taking an objective as he went. The Storm Raven opened up on the Lootas again, using the Machine Spirit to send a missile at the Grots. 3 Grots died but passed their save, and yet again the Lootas made loads of cover saves and only one died.

Both Dreadknight charged in. Dreadknight 1 killed 6 Orks, but with 4 Power Claws in range to attack this turn, Draigo and the Paladins were wiped out. The other Dreadknight pulled off a similar feat, killing 5 including a Nob, but Coteaz died unsurpringly.


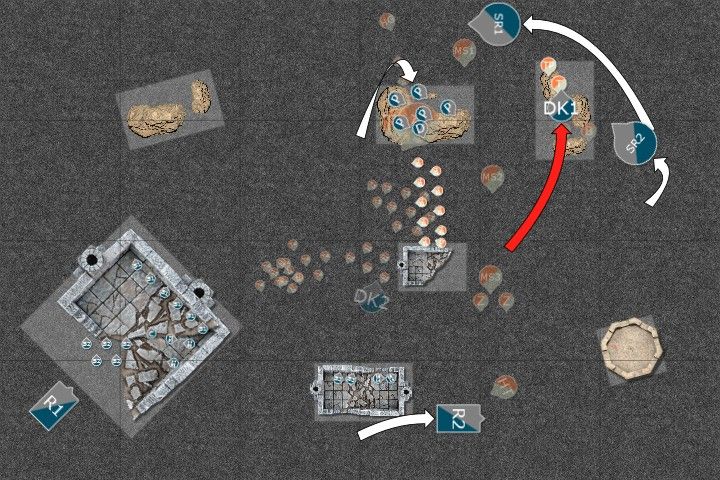
The unit that had just killed Coteaz moved to try and counter charge the Dreadknight, while the rest moved for objectives. The Lootas took out the second Raven, while in combat Dreadknight 1 was taken down. Dreadknight 2 killed 4 more Orks, but took 3 wounds.


Turn 4

At this point I knew I was probably going to lose, as the mass of bodies overran my army pretty quick. I tried to stay back and shoot with my Strikes but couldn't do anything else. The Rhino tank-shocked the Grots, but they passed their check again. The Dreadknight finally brought one of the squads below Mob rule size, however he was killed before it could matter.


The Ork turn was simple; move onto objectives and shoot. And with that my army was wiped.


Conclusions

It was partly a forseen conclusion based on the table, but some clever play could have seen me through had I thought of it at the right moment. In hindsight, I should have ran at the building, and just lined up at full 2" spacing all around the otuside of the walls, so he would have no way to move through it and would instead have to go around where Dreadkngiht would waiting with Heavy Incinerators. Unfortunately I don't tend to think of such unorthodox play in-game, but it will certainly be on my mind in the future.

The table aside, good cover saves by the Orks and sheer numbers won the day, however, the game looked fantastic with the small Grey Knight force fighting the massive Ork horde; as it should be. Thankfully my standing wasn't too awful, and I was only down 1 table for the last game, which would be against Brian Stack's Space Wolves.

Stay tuned.

Monday, September 10, 2012

NWG 2012 - Game 2

After a short recess from game 1 I found out that my round 3 opponent (remember I missed the first round) was Sean O'Regan, a player I had played in the first round the previous year. He was using his Nids again and was happy to know I didn't have loads of Purifiers this time. His list was a lot different than last time, with a load more hoards and a lot less multi-wound models. His list can be found below. There may be one of two upgrades I am forgetting.


Hive Tyrant
Wings, 2x TL Devourers, Hive Commander, Paryoxsm, The Horror

Tyranid Prime
Lashwhip and Bonesword


3x Hive Guard

2x Zoanthropes

In Transport 1


Tervigon
Onslaught

10x Termagaunts

10x Genestealers

20x Hormagaunts

Adrenal Glands, in Transport 2

20x Hormagaunts
Adrenal Glands, in Transport 3

6x Tyranid Warriors
Venom Cannon


10x Gargoyles

10x Gargoyles


Trygon

2x Biovores


Transport 1: Mycetic Spore
Transport 2: Mycetic Spore
Transport 3: Mycetic Spore


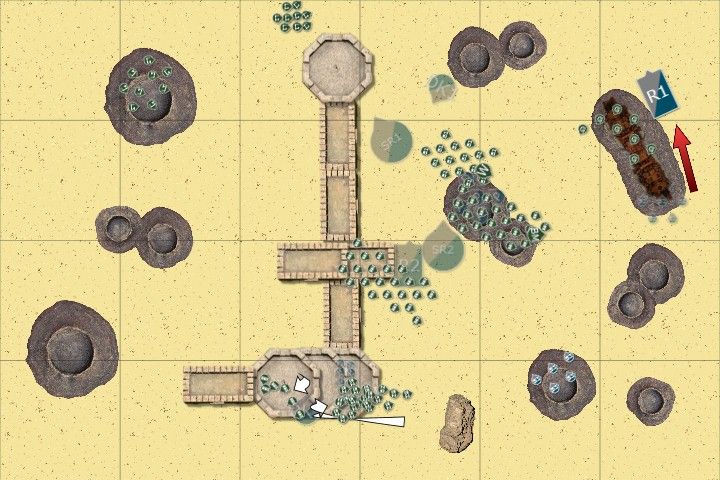
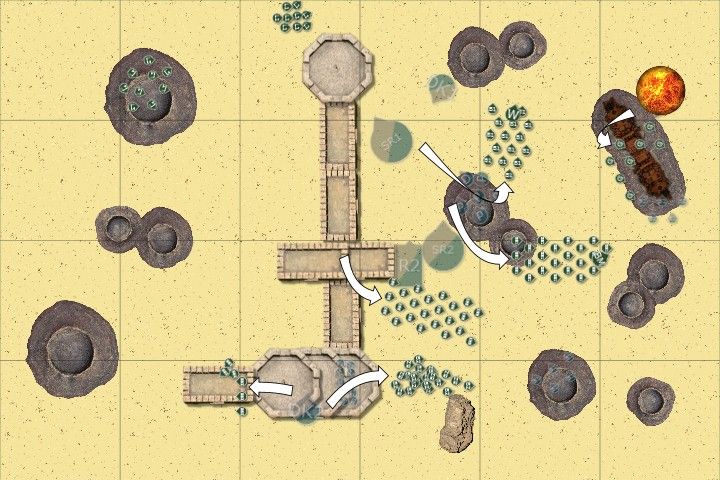
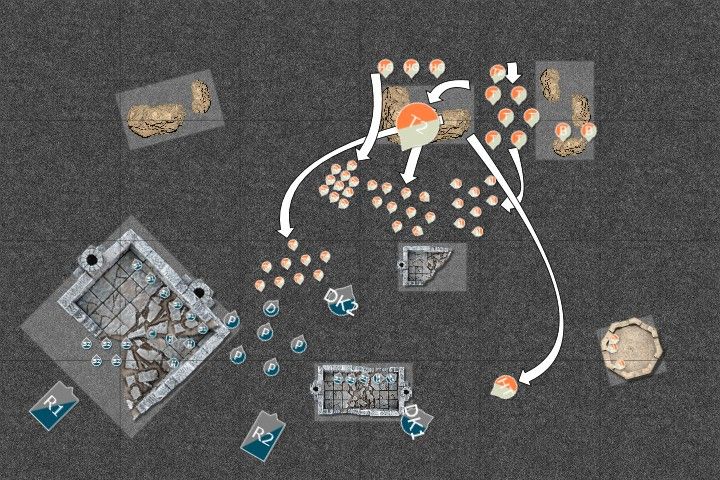
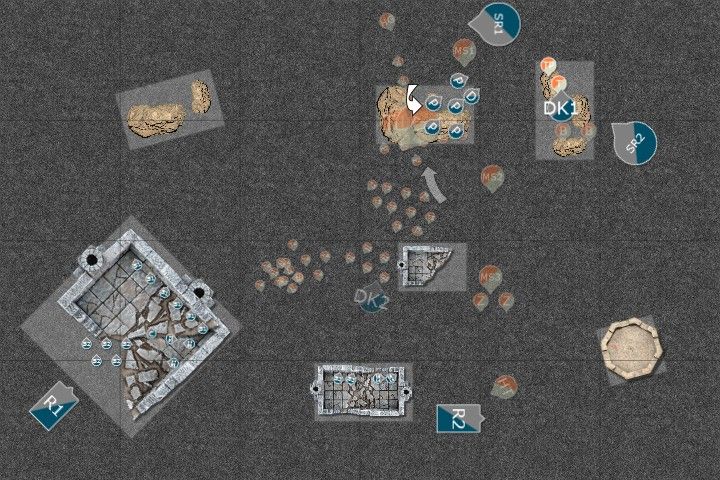
The way this scenario worked is that each side picked a terrain piece at least 3x3" in size in their deployment zone to be their objective. So it was basically the Emperor's Will with two terrain pieces acting as the objectives. We used Spearhead deployment for this game as well. I won the roll off and chose to go first, picking a very large building as my objective, while he got a much smaller rock formation. For Warlord traits I once again got the ability to reduce his reserve rolls by one, effectively cancelling off his Hive Commander ability. He got Night Fighter, and of course chose to make it Night Fighting for turn one. I got Attrition as my secondary objective, which meant that I had to kill more of his units than he did of mine. As it turned out at the end of the game, just like Alan, Sean got Trophy Kill as his. I got 2 units for my Grand Strategy and so made both my Dreadknights scoring.

Deployment can be seen below. I kept the Ravens only in reserve, while he had his three Spore units and the Trygon. His Genestealers infiltrated, though had limited options due to my deployment.


Turn 1

Turn one the Knights and the Paladins all moved out, with a Rhino following up the rear. The Strike combat squad in the central building moved over to spread out and get more guys in range. In shooting that unit killed two Gargoyles while the Dreadknight on the right flamed 7 Genestealers, though the remainder held their ground.


Starting the Tyranid turn the Tervigon spawned up 9 Termagaunts and cast Onslaught on them. Between their spawning distance, their move, and their run, they managed an 18" move that turn, right in Draigo's face to try block him off for a turn. The Hive Tyrant swung wide east while the rest of the army advanced in unison near the centre. Everything in the army that could shoot did, but failed to do any damage.


Turn 2

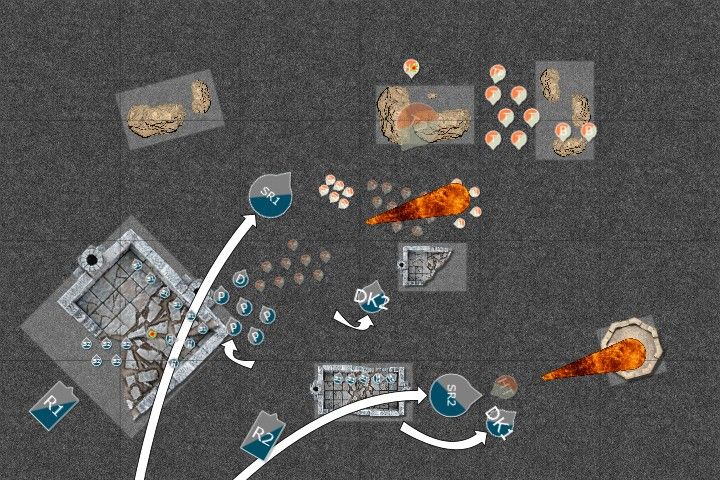
Starting he turn I cast a bunchof Psychic powers; 3 Warp Quakes and a Psychic Communion. Coteaz perils'ed on Prescience. Both Ravens entered play, with one going after the Flyrant and the other into the main hoard. Dreadknight 1 moved to kill the remaining Genestealers while the other moved up close to the hoard.

The onslaught of Grey Knight shooting proved very effective this turn. Storm Raven 2 managed to do 3 wounds to the Flyrant with the last dealt when it fell out of the sky. Dreadknight 1 flamed the Stealers but one survived and held. The other Dreadknight killed 10 Gaunts and 3 Gargoyles with his Incinerator. Draigo and the Paladins managed 4 wounds on the Tervigon, while the combat squad finished it off. Coteaz's squad killed off the spawned Gaunts, and Storm Raven 1 splits fire, killing 4 Gargoyles and 2 Hive Guard, doing a wound on the last. Dreadknight 1 tried assaulting the last Stealer but failed.


Only the Zoanthropes landed from reserves and just narrowly outside of Warp Quake range. The Gargoyles advanced while the Warriors retreated. The Warriors and Zoanthropes combined fire to killed a Dreadknight while the Biovores wounded the other. The lone Hive Guard took a pot shot at the Stormraven, causing locked velocity. The Gargoyles all shot at Draigo to no effect.


Turn 3

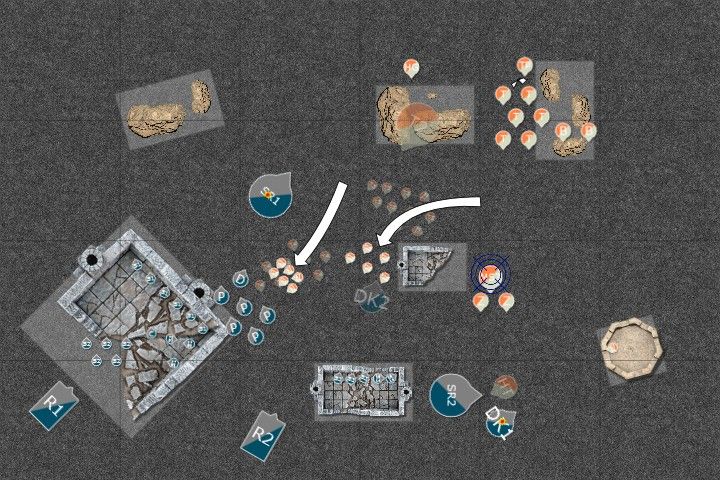
The Stormraven with locked velocity moved with the Dreadknight on the Zoanthropes, while the other Raven moved on the Warriors. Coteaz perils'ed again on Prescience. Draigo and co' moved forward for an assault while one of the Rhinos moved along the back field. One Striker in the middle building died to perils while both other units got up Warp Quake.

The Stormravens proved effective again, wiping out a Zoanthrope and two Warriors between them, as well as wounding another of each. The Dreadknights finished the Zoanthrope while also wounding the Spore behind it. The Rhino snap fired at the Stealer but missed and the Strikes wiped out the smaller Gargoyle squad. Coteaz and co' then charged the remaining squad as a means for additional movement (assault and consolidate was going to be better than just running). They easily wiped them out and advanced.


The Tervigon and one more Spore landed in the Nid DZ, with both units running. The Warriors continued to retreat. Some lucky shooting from the central Spore put a wound on the Dreadknight, but all other shooting was ineffective.


Turn 4

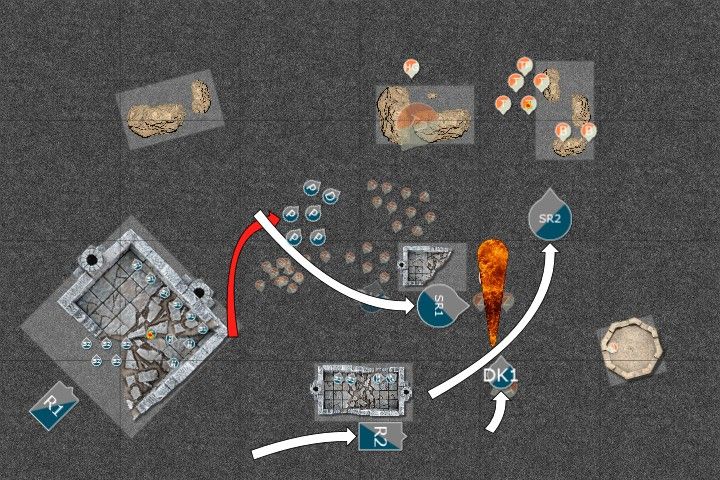
Raven 1 moved far out on the flank so it could at least shoot its Assault Cannon, while Raven 2 dropped to Hover mode. Warp Quakes went up again, and Coteaz finally got off Prescience on Draigo's unit before they advanced on the Tervigon. The Dreadknight moved on the Spore. Shooting saw off two more Warriors and assault saw both the Spore and the Tervigon cut down.


The last of the reserves arrived as the already present unit of Gaunts prepared to charge Draigo in order to hold him up. The Hive Guard and Warriors retreated once more while the newly arrived Gaunts ran. Shooting did nothing, but in assault 1 wound was done each to Draigo and a Paladin, though it cost the Nids 15 Gaunts to do so. The rest were in Synapse range so held.


Turn 5

The Rhino on the backfield moved in a bit closer while the Dreadknight moved on the objective. The Ravens manuvered, the damaged one staying in zoom mode. In shooting the last of the Hive Guard and Genestealers were finally killed along with the remaining Spores. Draigo and his unit killed the last of the Gaunts and prepared for the second wave while the Dreadknight stomped through the Biovores.


The last of the Gaunts charged the Paladins but this time were wiped out. Sean conceded at that, as if the game ended I won, and if it went on I would killed his last two models and still win. This is how the table looked at the end of the game.


Conclusions

Not much to say this time; it was Grey Knights versus Tyranids. He did a good job delaying Draigo but couldn't stop the Dreadknight. He also let the fear of Warp Quake dictate his drops too much, as the North-Western corner was safe for deployment. In the end I had both primary and secondary once again with a massive points difference in my favour; another 20-0 victory. This now had me in 4th place despite only playing 2 games, however things were about to get hard, as I found out for Sunday morning I was paired against the Green Tide of Jan Karnowski, regularly tournament winner in Ireland, and ETC vet. And I had no Purifiers this year. Ouch. But it was bar time, not a time to worry about the morning.

Stay tuned.