Saturday, March 27, 2010

Down the Road...2k vs Daemons

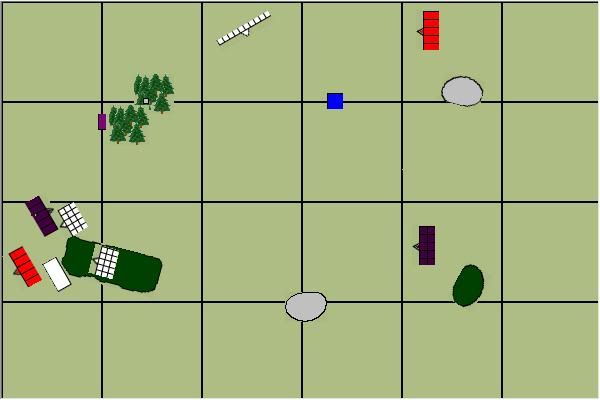
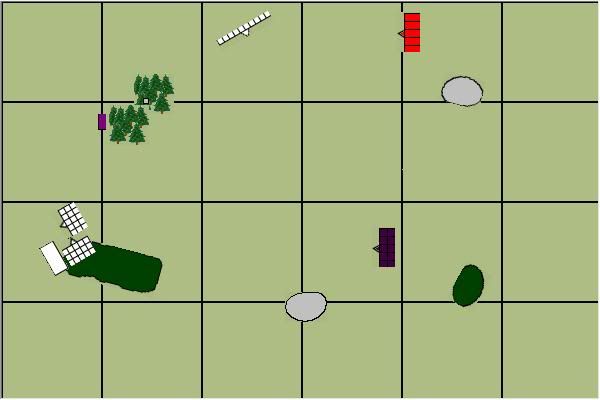
So I headed out to Ennis for a practice game tonight against Daemons of Chaos using the rules for Sunday's Gamer World tournament. A few discalimers, on a few rules debates a spectator made a lot of calls that were wrong, one of which drastically changed the outcome of the game. Also, I got one or two of my diagrams wrong, so when in doubt consult the text :)

So the restriction for this event are as follows:

* A MAXIMUM of 600 points may be spent on Characters
* A MINIMUM of 600 points must be spent on Core
* A MAXIMUM of 500 points may be spent on Special
* A MAXIMUM of 300 point may be spent on Rare
* No more than 2 of the same special choice may be selected
* Rares may not be duplicated, with the exception of High Elves, where they may be repeated once
* MAXIMUM 4 War machines per army
* MAXIMUM 3 Chariots per army
* MAXIMUM of 45 models, armed with missile weapons that have a range of over 20 inches
* No more than ONE terror causing Unit/Monster per army

Note that there was other allowances and restrictions for specific armies, but the only one in question for this game is that Daemonic Gifts were counted as unique, i.e. no two of one gift in the army. Also, only US5 units with a banner could capture or contest table quarters. My own army was as follows:
Sorcerer Lord [ Level 4 ]
2x Dispel Scrolls, Golden Eye of Tzeentch


Sorcerer [ Level 1 ]
Book of Secrets, Talisman of Protection


5x Chaos Knights
Mark of Khorne

5x Chaos Knights
Mark of Khorne

10x Chaos Warriors
Mark of Slaanesh, Full Command, Shields, Great Weapons, Warbanner

10x Chaos Warriors
Mark of Slaanesh, Full Command, Shields, Rapturous Standard

5x Marauder Horsemen
Mark of Slaanesh, Flails, Musician

5x Marauder Horsemen
Mark of Slaanesh, Spears, Throwing Spears, Musician

5x Hounds
5x Hounds


Chaos Spawn

Mark of Khorne

Hellcannon


The Daemon list I faced was tough but not broken and provided a good challenge. Note I am not 100% certain on the magical equipment.

Nurgle Herald
Slime Trail, Noxious Vapours

Slaanesh Herald
BSB, Etherblade

Khorne Herald

Tzeentch Herald

Master of Sorcery


5x Flesh Hounds


23x Bloodletters

Full Command

19x Plaguebearers
Full Command, Banner of Weeping Decay

23x Daemonettes
Full Command

10x Horrors


2x Fiends of Slaanesh

4x Flamers


James deployed units first and taking Lore of Beasts got the Bear's Anger and the Hunter's Spear. I rolled FF, Tranmorg., Pandaemonium, and Call to Glory for the Level 4, and the Level 1 took FF, and stupidly enough, Conflagration of Doom, me forgetting that being a level 1 he could only use 2PD per casting attempt, making the spell near impossible to cast.

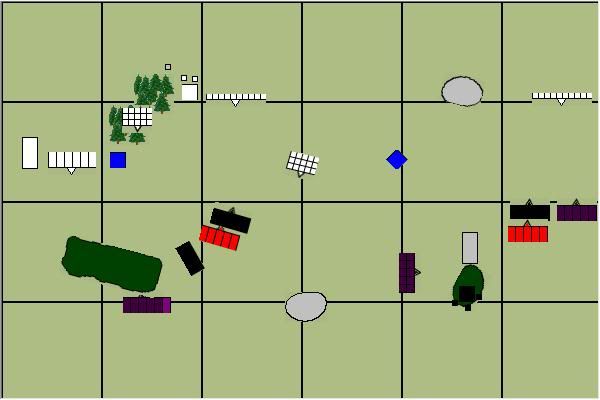
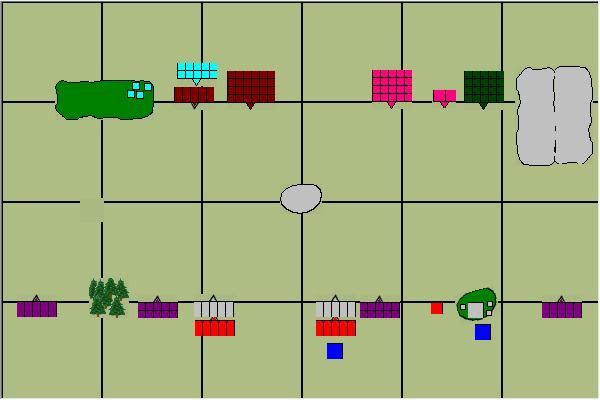
From my left to right, he deployed Flamers, Horrors with Herald, Flehs Hounds on front of these, Bloodletters with Herald, Daemonettes with Herald BSB, Fiends, and Plaguebearers with General. In the same direction I deployed Spear Horsemen, GW Warriors, Hounds screening Knights, Hounds screening Knights, Sorcerer Lord behind them, Rapturous Warriors, Spawn, Hellcannon, Level 1, Flail Horsemen.
Image


Turn 1

Rolling first turn the Daemons surged forward rough 8-10" on average. Magic was uneventful with the Spear out of range and so the turn passed to me.

In my turn, I manuvered the Hounds to divert the Bloodletters and Daemonettes the way I wanted and swung the Level 1 and Flail Horsemen around the right flank. The Spear Horsemen were apprehensive about the Flamers but moved up nonetheless. The Warriors and Knights positioned themselves for combat. The Hellcannon rampaged forward as did the Spawn, both moving 11". Magic failed or was dispelled making turn 2 come in a heartbeat.
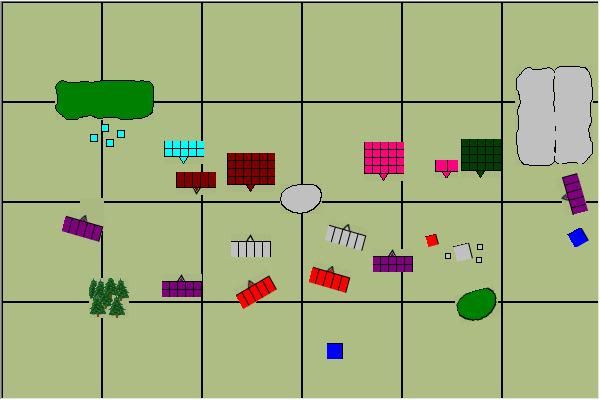
Image


Turn 2

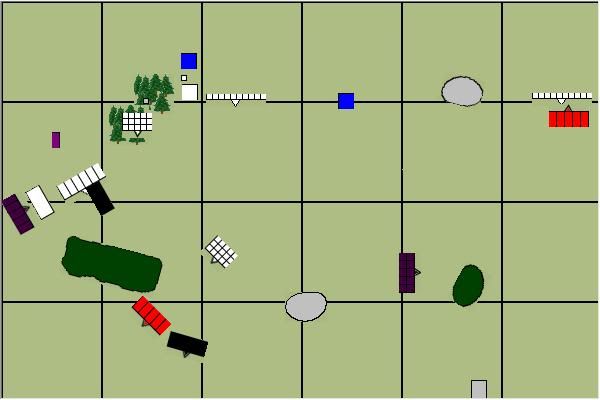
Taking the bait, the Daemonetters and Bloodletters respectively charged the two Hounds units, both of which fled. The Fiends charged the Hellcannon and the Plaguebearers charged the Spawn. The Flesh Hounds rounded out by charging the Chaos Warriors. The Flamers moved up to shoot up the Horsemen on the left flank while the Horrors stayed stationary. In magic all spells were dispelled again, and in shooting only a single Maruader fell despite the Flamers' 13 S4 shots. In combat, the Fiends killed two Chaos Dwarfs for no damage in return. Right next to them however the Spawn fared better, taking two wounds but striking back with 7A to kill the Nurgle Herald, felling the Daemon general in the second turn! Over on the right the Warriors took three wounds from the Flesh Hounds but managed to dish back one more to win the combat which saw a Hound fall to CR.

In the Chaos turn the Knights counter-charged the Flesh Hounds and Daemoenttes respectively, with the Rapturous Warriors joining in the Daemonette fight. One unit of Hounds fled the board while the other rallied. The Flail Horsemen charged the flank of the Fiends and the Spear Horsemen just managed to hit the Horrors. In magic only Pandaemonium managed to go through and with all shooters in combat, combat came early. On the eastern flank the Horsemen killed a Fiend, with the other dying to combat resolution. Similar happened with the Flesh Hounds, however in both accounts the spectator argued that since they clipped the other friendly unit in combat, neither unit could overrun, which I went along with for the sake of quailing an argument, however I checked the rulebook later to find he was wrong and I was right, something that cost me the Knights in the end. In the big combat in the center the BSB killed a Knight only to have several Daemonettes cut down in the process with more dying to CR. In the Horsemen vs Horrors bout neither side dealt any wounds and the Horsemen rolled insane courage to stay put. Finally, the Nurgle Daemons took down the Spawn with a poison jab.
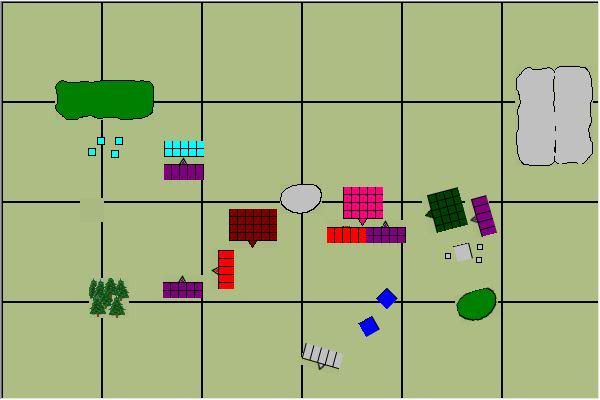
Image


Turn 3

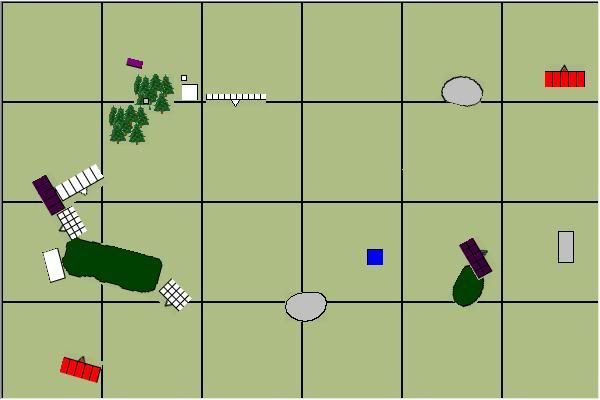
As a result of the bad rules argument of the previous turn going awry, my Knights saw a flank charge from the Bloodletters as the Plaguebearers joined the fray on the east side. The Flamers finished off charges by helping out the Horrors. With no magic to speak of combat ensued with another Knight getting chopped down in exchange for a Plaguebearer and a swathe of Daemonettes. The other Knight in the west easily broke from the Bloodletters who hit the Warbanner wielding Warriors. The Horsemen with Spears then fled the Tzeentch Daemons, landing in the forest after two were cut down.

In the Chaos turn the Flail Horsemen and Hellcannon slammed into the Plaguebearers' flank as the final two Spear Horsemen rallied. All the time circling the battlefield for a vantage point, the Tzeentch Sorcerers continued to stay on the move for fresh targets. The Chaos Knights then fled the board. Finding the Horrors they blasted fire at the warped Daemons but to no avail. In combat, after killing two more Knights, the Daemoenttes were completely cut down while a tonne of Plaguebearers fell also. The Bloodletters cut down two Chaos Warriors breaking the unit but failing to catch them.
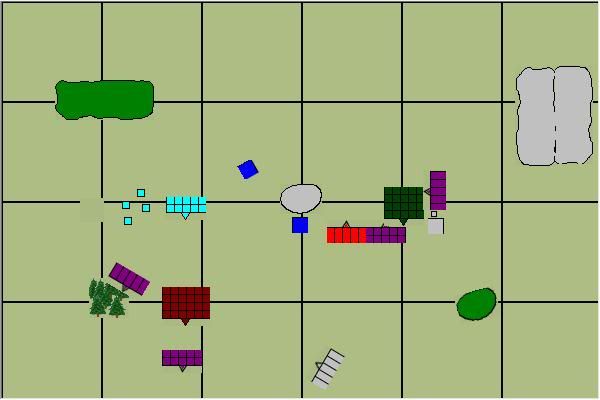
Image


Turn 4

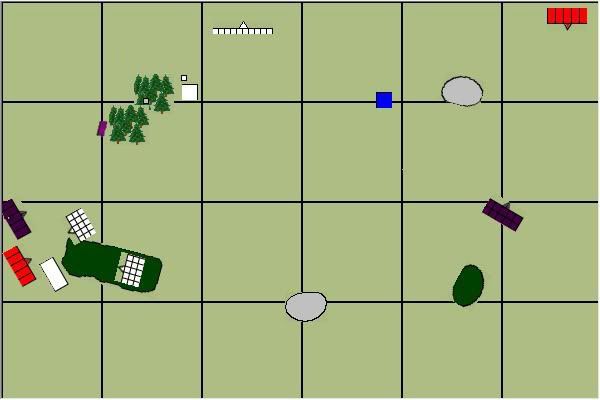
Continuing the chase of the Chaos Warriors, the Bloodletters ran the unit off of the board. The Flamers prepared to take aim at the Level 1 and the Horrors at the lone Chaos Knight that still stood. Magic once again did a wound to the Chaos Sorcerer. In combat, the Plaguebearers were taken down to alarming low numbers, with time and steel against them.

In the Chaos turn only the Sorcerers and Hounds could angle to get better targetting opertunities as did the remaining Knight, though magic yet again yielded no results. In the ensueing combat, the last of the Plaguebearers died.
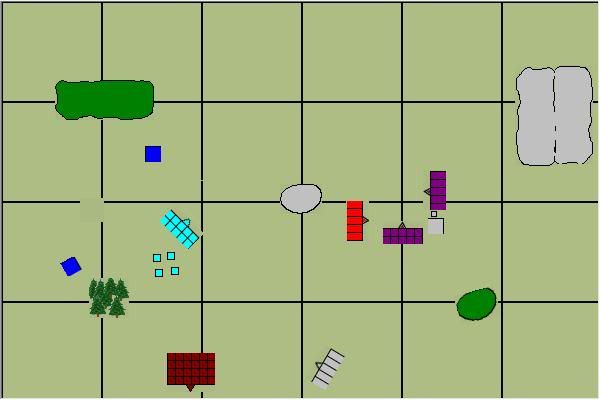
Image


Turn 5

Aiming now at the Knight the Flamers turned, with the Bloodletters turning to face the Hounds. In magic, the Hunter's Spear killed 4 Warriors leaving only 4 standing. With no combat the WoC turn took hold, in which the lone Knight rode toward the Bloodletters and the Level 4 circled the forest to get a shot. The Horsemen ran for cover, knowing their role was achieved. Magic managed to finally kill a single Bloodletter and set up Pandaemonium, and yet again there was no combat.
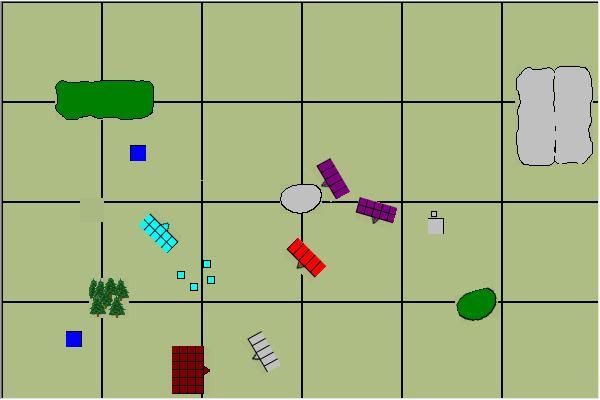
Image


Turn 6

To round out the Daemon game the Bloodletters charged the Hounds, who held. The Flamers tried to shoot down the Knight and failed, and thanks to Pandaemonium, the Tzeentch Herald miscast and took a wound. The Hounds were subsequently overrun. In the last Chaos turn magic and Daemonfire reined on the Bloodletters, killing 8, but not enough for half VP. At that the game ended a draw, or was it?
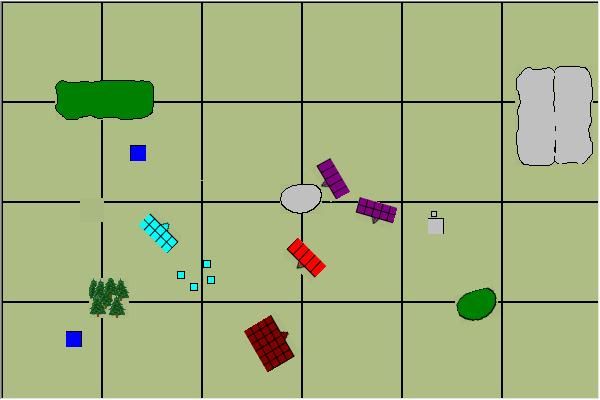
Image


Conclusions

Really intense game. Despite the actual outcome, morally and in the records I'm counting this as a minor victory as with the unnecessary interference costing me my Knights that is what it would have been even if the Knights didn't kill anything.

In a magic restricted environment, magic really doesn't do much against other magic armies. A Skaven Screaming Bell could murder the magic scene with ease. The Flail Horsemen were MVP in this game, helping to deal with the killing of three units, earning back more than quadruple their points. The Rapturous Warriors were also ace. Knowing the list a little better, I hope to be a little more successful on Sunday.

Friday, March 26, 2010

The Road to Vaticon Begins...

Right guys I'm just about to head off to my last practice game before the weekend begins and I have two tournaments in a row. I intend to keep real time updates here on Bloghammer, so please stay tuned to see how things are going.

Friday, March 19, 2010

The Road to Vaticon

So I have decided to attend the Vaticon WHFB tournament next week. It is a standard 2k tourney and is an ETC qualifier. After my fickle magic phases at Warpcon, I decided to try something a little less brutish and a little more tactical this time. I was to face Niall's High Elves once again, but against a much tougher list. I actually asked him to bring a Dragon so that I could test my new anti-Dragon set-up. My list was as follows:

Sorcerer Lord [ Level 4 ]
Mark of Tzeentch, Disk of Tzeentch, Golden Eye of Tzeentch, 2x Dispel Scrolls


Sorcerer [ Level 2 ]
Mark of Slaanesh, Steed of Slaanesh, Spell Familiar, Book of Secrets, Bloodcurdling Roar

Sorcerer [ Level 1 ]
Mark of Tzeentch, Disk of Tzeentch, Talisman of Protection


5x Chaos Knights
Mark of Khorne

5x Chaos Knights
Mark of Khorne

Chaos Chariot


10x Chaos Warriors

Full Command, Shields, Rapturous Standard

5x Marauder Horsemen
Mark of Slaanesh, Champion, Musician, Flails, Throwing Axes

5x Marauder Horsemen
Mark of Slaanesh, Musician, Spears

5x Hounds
5x Hounds


Hellcannon


I decided to try out some Slaanesh magic for psychological effect. The idea was that with the Spell Familiar I had a good chance of getting either Hysterical Frenzy or Tittilating Delusions. Delusions helps me keep the Dragon away of to get him trapped in difficult terrain. Frenzy allows me to force the Dragon to charge my Chaos Warriors who after a challenge from the Champion have a good chance of sticking around to hold up the Dragon for a turn or two. Giving him the Book of Secrets makes sure that he has at least two useful spells at all times.

Niall's list was not necessarily optimised, but it was no cakewalk either.


Prince
Dragon, Armour of Caledor, Guardian Pheonix, Star Lance


Mage [ Level 1 ]
2x Dispell Scrolls


15x Phoenix Guard
Standard Bearer with War Banner, Musician

15x White Lions
Standard Bearer with Standard of Balance, Musician

6x Dragon Princes
Standard Bearer with Banner of Arcane Protection, Musician

Lion Chariot


10x Archers
10x Archers


RBT


For spells my Lord rolled Fire, Transmorg, Glory and Gateway. My Slaanesh Sorcerer rolled Lash, Frenzy, Seisures, and rolled Dark Hand on the book. The Level 1 just took Fire. The High Elf Mage took Saphery.

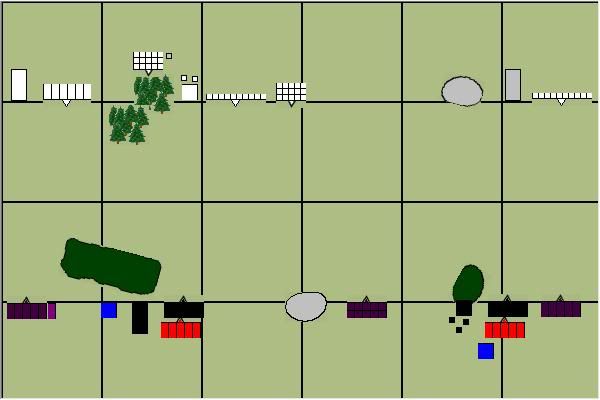
For deployment from my left to right he deployed Chariot, Princes, Lions, Mage, RBT, Archers, Phoenix Guard, Dragon, Archers. In the same direction I deployed Horsemen with Slaanesh Sorcerer, Level 1, Chariot, Knights screened by Hounds, Warriors, Hellcannon, Lord screened by Knights screened by Hounds, Horsemen. The full deployment can be seen in the diagram below.

Image

Niall took first turn and we began.


Turn 1

The Dragon immediately made a beeline for the Hellcannon. The Princes and Chariots advance a normal move while the Phoenix Guard ran full pelt. The Lions entered the forest to take shelter from the fear of taking Doomfire to the head like in the last game. The mage failed to cast any spells. The Archers shot down 3 Hounds on the left allowing the RBT to fell a Knight. The Dragon breathed fire on the Hellcannon but failed to wound it. Finally the eastern Archers slew two Horsemen.

In the Chaos turn, the Hellcannon approached the Dragon ready to shot it in the face. The cavalry on the eastern flank all ran straight at the Archers there while the Warriors moved to flank the Dragon if the Hellcannon could survive a turn. The other Horsemen hid behind the hill while the Chariot prepared to charge the Princes and the Hounds and Knights advanced down the middle. The Level 1 Sorcerer flew to the flank of the Dragon Princes. Im magic, Fire failed to cast on the Lion Chariot, and Seizures also failed on the White Lions. In a desparation move Niall used both scrolls to dispel a Fire on his Phoenix Guard and a Gateway on his Dragon. The Hellcannon lined up the Dragon and guessed bang on but the shot scattered off course.

End of Turn 1
Image


Turn 2

The Dragon charged the roaring Hellcannon without hesitation while the Phoenix Guard charged the Chaos Hounds only to see the runts flee. The High Elf forces on the western flank continued to circle around ready to charge or be charged. The White Lions moved to the forest's edge ready to charge out into battle now that their lord had the Hellcannon in his grasp. Magic again failed to yield results and the RBT failed to hit all 6 shots. The Archers in the east had better luck killing all 5 Hounds but their brethren in th centre could not dent the Knights' armour. In combat, the Dragon munched up the Hellcannon and overran the crew off of the table.

The Horsemen in the east sounded a charge but were cut down by elven arrows before they could reach the Archers. The frenzied Knights failed a charge on them also. The Knights in the centre hit hard on Phoenix Guard, as the Chariot smashed into the Dragon Princes. The Slaanesh Sorcerer departed from his unit running straight through a gap to the rear of the High Elf lines. His former unit then circled around the Lion Chariot's flank. The Level 1 flew behind the RBT and the Lord flew next to the central Archers, with the Hounds failing to rally. In magic, one crew man was lost from the war machine and two Archers were burned alive. Gateway miscast wounding the wizard and the Slaaneshi Sorcerer failed once again to cast his spell. In combat, the Chariot did 7 Impact Hits, wounding 5 times but only piercing the armour twice. The Princes retaliated with a wound and then took a further wound; though they won by one the Chariot held fast. In the center the Phoenix Guard managed to slay a Knight and the remaining 3 fluffed their attacks hitting only 3 times and killing only 2. The horses killed one more but the Knights lost and ran, though outrunning their pursuers thankfully.

End of Turn 2
Image


Turn 3

The Dragon returned and headed straight for the closest Knight unit. The Phoenix Guard further attempted the catch the fleeing Knights but failed. The White Lions left the forest and hit the flank of the Chaos Chariot while the Lion Chariot moved out of the charge arc of the Horsemen. In magic, Shield of Saphery was cast on the White Lions with IF, and the RBT then in shooting slew the Level 1 Sorcerer. The Archers in the east also managed to kill a Knight. The other Archers managed at range to pick off a single Chaos Warrior. In combat the Chaos Chariot was torn apart by the High Elves and the White Lions overran 6".

Seeing the Dragon behind them the chosen of Khorne hit the Archers hard looknig to overrun right off the board. The Warriors also moved in the try intercept the winged monster. The Knights that were fleeing rallied however they had already lost Khorne's blessing. The Hounds besides them kept running until they had left the board. The Horsemen that remained flank charged the Dragon Princes while their former master ran around the back of the forest of his lightning steed. The Tzeentch Lord also flew toward the Dragons flank with hopes to cast the creature into the warp. In magic a Flickering Fire managed to kill two more Phoenix Guard while the Slaanesh Sorcerer miscast. However, his spell managed to hit the White Lions with IF, though the Sorcerer then forgot how to use it. The Seizures that gripped the Lions tore 5 of them apart but their magical banner helped keep their nerve. With a final effort the Lord of Tzeentch conjured up a powerful Infernal Gateway which slew the High Elf Prince in his saddle and wounded his loyal steed twice, though the Beast managed to keep its temper and not freak out at the loss of its master. Its sights were too focused on the Knights before it. In combat those very Knights ran down the Archers but only ran 4" leaving them sitting ducks for the now riderless Dragon. With the Speed of Asuryan, the Dragon Prince slew a Horsemen who failed to return any damage, thus drawing the combat.

End of Turn 3
Image


Turn 4

In revenge for it fallen master the Star Dragon smashed into the rear of the Chaos Knights while the rest of the High Elf force circled the Chaos forces on the western flank. Both magic and shooting were unsuccessful in this turn but the Dragon Princes managed to break the Horsemen, standing their ground wrongfully expecting the riders of Slaanesh to leave the table. The Dragon didn't fare all too well, killing only a single Knight, breaking them, but failing to catch them.

The Chaos turn was to be a bloody one. The Sorcerer Lord once again flee up next to the Archers while the Slaaneshi Sorcerer ran back around to where the action was on the left flank. The rallied Horsemen ran in between the Lions and Chariot and the Knights ran around the Chariot ready to flank the Dragon Princes. The Warriors continued toward the Dragon and the Knights in the east corner rallied ready to tackle the Dragon once more. Magic this turn was to be devastating to the High Elf forces. The Lord alone managed to kill 4 Archers making the rest flee, before casting an irresistable Gateway that made the Dragon disappear with a S12 hit. To round out the turn the Slaaneshi Sorcerer's roar killed two Dragon Princes causing the last to flee the table.

End of Turn 4
Image


Turn 5

Coming off a bad turn, the White Lions turned to face the oncoming chargers as the Phoenix Guard struggled to close in on time to help their brethren. The Archers rallied also. Magic as usual was insignificant, and the RBT failed to do any damage to the Sorcerer Lord.

Once the Chaos turn began the Knights and Horsemen declared a combined charge at the White Lions in a last gambet to earn some points back. The Warriors moved to take a table quarter as the Knights ran at the Archers. The two Sorcerers stayed stationary. In magica single Phoenix Guard was felled by a Flickering Fire but that was all. In combat the Knights and Horsemen fluffed their attacks only killing two White Lions, losing combat. The Knights broke while the Horsemen remained.

End of Turn 5
Image


Turn 6

As a last charge, all of the High Elf forces sandwiched the Horsemen cutting them down while the Archers took a wound from the Sorcerer Lord.

The Chaos turn proved catastrophic as the Knights failed to rally, leaving the table, and the Sorcerer Lord miscast, killing himself. The Slaaneshi Sorcerer managed to kill one White Lion, and the game ended a draw.

End of Turn 6
Image


Conclusion

Firstly, God how stupid I can be sometimes. I take Slaaneshi magic to deal with Dragons and then deploy my Sorcerer at the opposite end of the board from the Dragon. Due to this I really don't know how well the magic will work so will need more testing. Against T3 armies it certainly will always be useful, but I really wanna try it and the Warriors properly before making a definite conclusion on the list. One thing I am certain of though; Roar is pointless as I either forget or it does nothing, and so too was the Champion and Axes on his unit. I am instead going to invest in giving the Level 1 the Puppet to help against those miscasts which are finally catching up to me.

On the game, I think I played ok, luck really had a lot to do with the outcome, fluffing several critical combats and miscasting 3 times.

Report against Wood Elves with a Forest Dragon on Sunday.

Wednesday, March 10, 2010

Four Horsemen of Chaos

As we all know the Chaos Gods are modeled after the Four Horsemen of the Apocalypse; Khorne - Death, Nurgle - Pestilence, Slaanesh - Famine, Tzeentch - War. Lately I've been thinking about how these relations and themes can be used in creain an army, be it a themed build or themed models.

The colours are one thing to consider. Whereas Khorne, Nurgle, Slaanesh and Tzeentch are Red, Green, Pink, and Blue respectively, Death rode a Pale Steed (most often depicted as a fair brown), Pestilence rode a White Steed, Famine rode a Black Steed, and War rode a Red Steed. So Brown Khorne, White Nurgle, Black Slaanesh, and Red Tzeentch??? Interesting huh?

Any ideas? Please comment.