So had another game last night and though we are still learning in our gaming group, I decided I'd put up a battle report of our game. So setting up we decided to play to a points value that my opponent could make up with his painted models that he had with him and as it turned out he could make 35pts so I used the same list I had been working on for awhile.
eCaine Defender Journeyman Warcaster Charger Arcane Tempest Gun Mages Gun Mage Officer Cyclone The Black 13th eEiryss
I'm hoping to take pEiryss in future lists, as I prefer her, but since I prefered the eEiryss model I am still waiting on the pEiryss card to arrive from PP. Note in the report we had a break mid-game so I am a little hazy on the details.
He won the roll off and chose to have me deploy first. The table was pretty even with a hill and a building on either side, and with a forest on my side and ruins on his. I stuck the Black 13th over behind the forest intending to Advance Deploy Eiryss out on front of them in the forest. I put the Gun Mages with UA and Cyclone behind the building and Caine and the Jr. off to the side of it covered by the Charger and Defender. He set up his whole force opposite Caine with the Man-o-wars taking a flank with a line of jacks next to them. The Butcher hid behind them.
First turn I just shuffled my models around a bit for better range and firing positions next turn. I put up Arcane Shield and Blur on the Defender and left him covering the Charger and warcasters. The Khador army just ran forward.
I upkept both my spells and Caine kept his focus while the Jr. gave her remaining two to the Charger. I decided to take what I thought was a risk in turn 2 (as it turns out it wasn't a risk at all; more on that later). I moved Eiryss out and shot the nearest Destroyer, opting for the one damage on his 4 and more importantly disrupting him. The Defender moved into range and pummeled the other Destroyer, doing a hefty amount of damage. The Charger popped off two shots, one fully boosted, at the same jack and did some more damage. Everything else redeployed.
Butcher spread his focus between the other three jacks and then we made our first mistake. One of the Juggernauts shot at Eiryss; I thought Stealth only worked when concealed, camoflagued or in cover. Luckily, he missed. The other one shot at the Charger and did a few points of damage, nearly crippling his movement. Everything else either moved or ran.
I repeated the same focus steps for turn 3 however I dropped Blur on the Defender so Caine would have more focus. I didn't see an assassination run in the usual style as working too well on the DEF14 ARM18 Butcher, not to mention that I would likely have to wait for his jacks to make contact first. Instead Caine moved up a popped his feat in order to wipe out two of the Man-o-wars. The Cyclone moved and Thunderbolted the closet Destroyer, getting a critical knockdown in the process. The Defender then backed off and shot his also, doing only a tiny bit of damage. The Charger shot at the Man-o-wars, but didn't do enough to kill one. The Gun Mages then moved out and shot at the other Destroyer, however only three were in range so they combined they ranged attack into Arcane Inferno and did a tiny bit of damage. Eiryss also took another point from his 4 and disrupted him. The Black 13th moved up more but were still out of range (still not entirely sure how best to use these guys).
With jacks disrupted and knocked down the Butcher spread out minimal focus and then put up Full Throttle. The Juggernaut shot at Eiryss again and this time my rules mistake cost me as he hit and killed her. The second Juggernaut advanced and shot at the Gun Mages, killing 4. The Destroyer that was downed used a focus to get up and then charged the Gun Mages, killing the UA. The rest just ran.
With the Khador army about to close in I knew I had to pull something out of the bag here or lose. I reckoned I had just enough movement with the last two Gun Mages (the death of the UA put them out of the Destroyer's melee range) to Thunderbolt the Destroyer protecting the Butcher. As it turned out I was right and they managed to push it enough that the Butcher was no longer protected. The Cyclone and Charger then teamed up and with some hot rolling took down the Butcher to win the game for Cygnar.
Observations: - I haven't a clue on how to best use the Black 13th. This is something I will need to work on. - Using Stealth properly would have been a huge help. That being said though, I do prefer pEiryss, and indeed she had two clean shots at the Butcher this game, however eEiryss couldn't do a whole lot to him. - Even without a properly written list, Khador stuff is **** hard to kill with shooting.
I decided I'd do a Christmas post, though it has nothing to do with Christmas past the best wishes to all, and all that jazz.
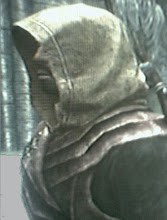
So onto the important stuff; I got some more painting done. Since I last posted I have put most of my focus (no pun intended) into painting some solos, namely Reinholdt, a Squire, and Eiryss. All are pretty cool models and I got sick of wet-brushing the jacks to get the white right; this technique isn't necessary on the much smaller models, especially since their armour is more jagged and less rounded. As a note, you'll probably notice that the right side of Eiryss' face is a bit blotchy. This is due to a bad spot of the sculpt where the lips seem to have been smoothed down to one side of the face, leaving an odd lump under the cheek.
With these three finished I'm going to touch up a Charger I have done somewhere and try finish the Defender that's been sitting on my desk for the last few weeks, after which I will start the Black 13th. Anyhow, pictures are below, comments appreciated.
Well it's been quite awhile since my last post; a cocktail of cancelled events, commissions and (lots of) Skyrim has kept me away and busy. However I have the game all but finished and posted one commission last week while the other is been worked on sporadically. As such I've moved on to new things.
Most recently, I attended Moocon Fore yesterday, a 1000pts Highlander style 40k tournament. By Highlander style I mean that you could not duplicate any unit, even dedicated transports. Undoubtedly it was going to be new and interesting, especially as I've always seen that some players may or may not be as capable without access to their SPAM armies (I may have been one of them sure). So the challenge was there. I decided to deviate slightly from my typical armies and go back to something old as I wanted to have sturdy scoring units which would be more important than ever in such an environment.
Ordo Xenos Inquisitor Power Armour, Rad Grenades, Psychotroke Grenades, Hammerhand
Transport 1: Rhino Transport 2: Razorback with Psybolt Ammunition
The other option was Coteaz and Henchmen in a Chimera but I felt despite being on foot the Terminators would make a sturdier scoring Troop, plus, I'd get Grenades this way.
So game 1 I got Jimmy Murphy's Orks. It didn't have the hordes of Boyz that the Purifiers would like, but Orks struggle with Grey Knights one way or the other. He had Ghazghul, 3 Meganobz, a Warboss on a bike, 3 Nob Bikers, 12 Boyz in a Trukk, a Battlewagon, and a Deffkopta. The mission was Spearhead Seize Ground (5). I deployed down in the south-east corner bunkering around some ruins, with a hill just north of me. There was another large ruin around the centre and Jimmy deployed behind that mostly out of sight in his quarter. He managed to steal and surged forward. His only shooting was Big Shootas so I came out of it unscathed. He couldn't say the same in my first turn however, as the Battlewagon went down to the first Psycannon, the Deffkopta was taken out by the Heavy Bolter and then Dreadnought fire put a wound on Ghaz. In his second turn he ran up with everything and the Boyz unloaded. He then declared the Waagh and charged absolutely everything into the Terminators at the frontline of my army. The Terminators were in terrain so struck first, however they fluffed almost everything and managed to kill only two Boyz. In return the Orks did 27 wounds collectively, and though I made 22 successful saves, the fails were one a piece and the unit was wiped. The OXI and Purifiers got out and went into the same ruin and the rest of the army backed off. Shooting saw a Meganob killed but that was all. The Purifiers charged just the Boyz (electing not to multi charge the Meganobz as to not be oversaturated with psychic power choices). They easily wiped them out and consolidated out of Ghaz' reach. Ghaz went after the Rhino, the Bikes went after the Ven Dread, and the Meganobz went for the Dread. The Bikeboss went for the Razorback but couldn't reach it. Ghaz easily tore open the Rhino but both Dread held on, with the regular losing his arms. The Purifiers went into the Bikeboss and the Strikes got out and went at Ghaz. Both were successful and the Dread continued to hold things up. The rest of the game the Dreads held up the last two Ork units until the Strikes and Purifiers could charge and finish them off, netting me a 17-3 victory.
I moved up to table 3 for game 2 and was to play Dawn of War Annihilation against Tadhgfffff Murphy's Blood Angels Funwagon. He had Meph, 8 Death Company and a DC Dread in a Raven, and a Rhino. He deployed Meph in the centre behind the Rhino in a ruin. I deployed my Strikes in their Razorback behind a hill in the corner. First turn he moved toward them fast while the Raven came on Flat-Out in the same direction. He fired one missile and popped the Razorback. I brought the Termies with OXI on near Meph while the rest of the army came on the far side hoping the Termies could claw out a few KP while the Dreads supported at range. The army managed to blow up Meph's Rhino and destroy the Raven's Multi-Melta before the Termies charged Meph and killed him. The Raven moved inward and the Dread jumped out and assaulted the Termies (after the Raven killed one). The Termies failed Hammerhand leaving the unit at S5. They hit with one Grenade but couldn't get the glance. The Dread then munched through the whole unit and then ran down the OXI. The Strikes couldn't get away so stayed put and put a Heavy Psycannon shot into the Dread, taking off its Melta arm. The rest of the army shot at the Raven, blowing it up. The now disembarked Death Company made a beeline for the rest of the army on the far side. The Dread went into the Strikes, killing three. The army shot at the DC as they crossed the field and over few turns managed to reduce them to two models before charging them and finishing them. His Dread was meanwhile done with the Strikes and on his way. He finally made a 6" charge through terrain and killed all but one Purifier, who hit twice with his S10 Hammer, and then failed to pen, meaning he died in my turn while my Dreads could do nothing, and so Tadgh narrowly won the game 14-6.
Game 3 was on table 4 with Merv Murphy's Grey Knights. Capture and Control Pitched Battle GK vs GK; fun. Merv had Coteaz, an OXI with all the grenades, 10 Strikes in a Raven, a PsyDread, a PsyBack, a Vindicare, and 5 Henchmen in a Chimera. I deployed in cover as Coteaz could easily take the initiative (though I kept the Termies in reserve to stay safe of Mindstrikes), but he played safe and reserved everything bar the Strikes who went on foot behind a large hill so I couldn't see them. Vindicare outflanked. I just shuffled in my first two turns as he did nothing in his first; Termies didn't come on thank God. Raven came in and went Flat-Out up the middle and everything else came on back in the corner behind the same hill as the Strikes, including the Vindicare as I had made sure he would not be in pistol range of anything without cover. The Termies then came on turn 3 and ran up the flank opposite Merv's army. Everything else worked on the Raven until it went down. He stayed in the corner, shooting over the hill and the Vindicare trying to pop shot Termies. Meanwhile I kept avancng stadil with the Purifiers and Termies while the Strikes hit and the Dreads supported. I managed to pop the Razorback, and eventually forced him to pull his Strikes off the objective and hold it with the Henchmen. By turn 5 I had my whole army and he had lost his Raven and Razorback. In turn 6 he managed to take out my Rhino and a Dread, however the Termies and Purifiers took out the two Strike combat squads. However poor consolidation rolls kept them from contesting his objective and so the game ended in an 11-9 draw to me.
Game 4 was another GK vs GK fest on table 5 with Ivan 'Nudie' McTubbs nee-Sheehan. It was Seize Ground (3) Dawn of War. He got to place two but had to place them in the open while I placed my one in a ruin. He had Coteaz, and OXI with all the grenades, 8 Strikes in a Raven, 3 Henchmen in a PsyBack, a Vindicare, and a Dreadknight. He deployed dead centre, with the Knight behind the Raven. The PsyBack went on the left near a hill. I bunkered in a ruin to my left and again reserved the Termies. Vindicare Infiltrated in a wood to the east. He zoomed up the centre with the Raven, shunting with the Knight. The Vindicare took out my normal Dread. I kept my positioning mostly intact and opted to forgo smoke for firepower. I managed to wreck the Raven, but couldn't get the Vindicare. In his turn the Vindicare popped the Rhino, leaving his Strikes with characters assault the Purifiers after I placed them poorly, and his Psya blew up mine, killing one Strike. In the assault my Grenades managed to reduce his attacks meaning the Justicar survived, and I was able to kill three of his guys. Just in time the Termies showed up and assaulted. The Strike assaulted the Dreadknight. This time I de-gunned and immobolized his PsyBack and wounded the Vindicare. In the assault his Grenades got to take effect again, and unfortunately mu Justicar Perils'ed and died. Major fluffage followed leaving Coteaz and three strikes alive, while my last Purifier and 2 more Termies died. The Dreadknight meanwhile got Force Weapon'ed to death. In his turn he failed to take down my Ven Dread with the Vindicare and killed the last of the Termies who only wiped one Strike. In my turn my Strikes assaulted and wiped one of his and Coteaz, sending the last running, while the Ven Dread killed the Vindicare. In his turn he debussed and hid with the Henchmen while the last Strike ran. In my turn I opted to run instead of shoot with the Ven Dread so as to assure the lone Strike couldn't contest or take, and my Strikes shot at the Henchmen, killing one but failing to panic them. In his turn they moved and ran however as the game ended it turned out they were actually 4" from the objective and so I got a 16-4 win.
Last game was on table 4 again playing Spearhead Annihilation against Caolan 'Slim' Gibbons' Blood Angels. He had Dante and 5 Sang Guard in a Raven with a Fury Dread, 5 Marines in a Razorback, and a Land Speeder. I made a similar deployment to game 3 in the same spot but with the Termies manning the frontlines this time. He reserved everything. I shuffled and cast Warp Quake while I waited. In turn 2 his Raven and Speeder came on, the Speeder scattering but avoiding Warp Quake. He failed to do anything with his shooting. On the flip-side, my shooting was quite the opposite. First shot took out the Raven, killing a Sang Guard in the blast. Next shot blew up his Dread killing another Sang Guard. Next shoot blew up the Speeder, while the rest wounded Dante. In his turn the Razorback came on and realising he couldn't risk it, hid behind the same large hill Merv used earlier. Dante and co advanced and blew up the normal Dread. I chose to play the game out instead of running and hiding for the win and pumped all but the Purifiers into Dante's boys, but only killed one. They retaliated by killing the Terminators. However in the following turn I wiped them and that was that; an 18-2 win to me.
So after 3 large wins, a winning draw, and a minor loss I was on 68pts and managed to pull 4th place out of 32 players, which I was both surprised and delighted with. There's no doubt that dice were with me at times, but games 2 and 3 showed that this was not always the case, so I was delighted with my performance. I had a great day also and will be back again for Moocon 5 - The Hand of the Moo.
With that (not so quick) report out of the way, it brings me to the other thing I've been up to - Warmachine. After been interested back in September one of the lads finally brought up his models and we got to play. After one of the lads bought some Cryx (my first choice) I decided to go with Cygnar instead and have not regretted it. The models are sweet and the army is pretty awesome. After reading the book I really wanted to use eCaine (the model is unreal to boot) and so instead of buying a started I wrote a 35pt list and just started buying models toward it working with what I had for smaller games. So far I've lost to Cryx, beaten Menoth, and tied in a team game teaming with Khador against Cryx and Menoth.
The main thing I found with Warmachine was how different the models were. They were more natural and less over the top than most GW stuff, and found myself compelled to begin painting right away. So far I've gotten Caine, a Sentinel and a Journeyman Caster painted from the list, and am currently working on a Defender, a Squire, and Eiryss. Pictures of my finished models are below. As you will notice, I haven't gone with the standard rulebook blue, and instead opted for a colour scheme I had originally intended for my Grey Knights had I not already painted a few models grey.
King Con is only just over two weeks away now, but in typical me fashion I have yet to try out my list yet (games are hard to come by these days). I have the list written and it isn't far off the 2000pts list I have been using successfully recently (remember King Con is 2500pts). Anyway as promised, the list is below.
Coteaz
Librarian Might of Titan, Sanctuary, Shrouding, 2x Servo-Skulls
Vindicare Assassin
5x Purifiers 2x Halberds, 2x Psycannons, Hammer in Transport 1
5x Purifiers 2x Halberds, 2x Psycannons, Hammer in Transport 2
10x Grey Knights 2x Psycannons, Psybolt Ammunition in Transport 3
5x Grey Knights 2x Psycannons in Transport 4
5x Grey Knights 2x Psycannons in Transport 5
10x Henchmen 6x Death Cult Assassins, 4x Crusaders in Transport 6 4x Henchmen Jokaero, 3x Acolytes with Meltaguns in Transport 7
4x Henchmen Jokaero, 3x Acolytes with Meltaguns in Transport 8
Storm Raven Twin-Linked Multi-Melta, Twin-Linked Plasma Cannon, Extra Armour, Searchlight
Transport 1: Rhino with Searchlight Transport 2: Rhino with Searchlight Transport 3: Razorback with Psybolt Ammunition Transport 4: Razorback with Psybolt Ammunition Transport 5: Razorback with Psybolt Ammunition Transport 6: Razorback with Psybolt Ammunition Transport 7: Chimera with Multi-Laser and Heavy Flamer Transport 8: Chimera with Multi-Laser and Heavy Flamer
Like I said, it is very similar to my current 2000pts list. The OXI is swapped out for a Librarian with the usual powers who goes in the Raven with the DCA squad, who in turn give their Razorback to the combat squad from the 10 strong Grey Knights (even though they have to walk into it). The choice for a 10 man squad here was to fit in a second JokMelta squad and to end up with an extra tank and 7 scoring choices. It also gets me more S5 Storm Bolters.
The new trick I really need to learn is the best ways to use the Raven. Deployment seems easy, i.e. don't unless you are going first. I'm reckoning it will play similar to Eldar vehicles except that it will be able to shoot a gun when it goes zoom-zoom. Now just to get some practice games.
Conclave has been and gone and it was a blast. As I intended I will now be providing a full report of the tournament. As a reminder, the list I was bringing for this 2000pt tournament can be found here.
So I was up bright and too-early Saturday morning and with everything packed away I grabbed a quick breakfast and was on my way. I met one of the lads from the club along the way and when we arrived there were already a lot of players setting up their armies on trays to prepare. So as such I got a tray and set my own up. Draws weren't too long after this and for round one I got paired up against an old nemesis Alex Wills and his Orks. My Purifiers were smiling this morning.
There was wargear on the Warboss' obviously but I never got to find out what it was. Similarly other unit then the Boyz may have had more items too.
So the first scenario was Annihilaton Pitched Battle. Alex won the roll off and deployed spread across the board, with a heavy Boyz presense on the western side with the other slots more prevelant in the east. I took advantage of that and deployed heavily to the east so I could maximise my shooting before getting in combat with awl da boyz. I placed my Servo Skulls to force his Deffkoptas out in the open instead of allowing them to Scout down my flank and so they went Flat-Out toward my lines.
Thank to my good friend Coteaz I stole the initiative.
Turn 1
Not much movement; I moved a Chimera to flame the Deffkoptas (get something through the cover save at least) and redeployed the Razorback that hid behind it. The west Rhino popped smoke.
Anyway the army opened up on the Orks with great efficiency. The Dreads each accounted for a Looted Wagon, two being wrecked while one blew up killing 10 Grots and causing the rest to run off the board. The Chimera's Flamer took out a Deffkopta and the Meltaguns from the back of it took out the other. The Heavy Bolters then combined until the Trukk was taken out. The Vindicare finished up by unsuccessfully sniping the Waagh Banner from the now disembarked Nobs. I was now up 5-0 after just one turn.
All the Orks did in their turn was run at me.
Turn 2
A redeployed a Razorback and a Dread for firing lanes. Both units of Purifiers then disembarked and moved toward the Nob unit.
Shooting wasn't as eeffective this turn as it took almost the entire army just to take out a unit of Warbuggies while the other unit's Nob took a wound.
The Purifiers both charged in. The OXI threw her Grenades disorienting the Orks and causing one Warboss and 4 Nobs to strike out against their own. The OXI cast Hammerhand however Coteaz failed. The Purifiers then started hacking down Nobs and Warboss'. The OXI's unit managed to activate Force Weapons however the Knight of the Flame from Coteaz' unit failed trying and died to Perils. 3 Purifiers from Coteaz unit were killed in the return attacks, though not before 4 Nobs and both Warboss' were taken out. The remaining Nobs and their Painboy fled but were swept, Coteaz' unit consolidating back toward the Chimera and the OXI's unit moving behind cover.
The Boyz units kept moving east and running, bar two as one shot at Coteaz' unit killing one, and the other charged Coteaz' unit along with the remainging Warbuggies.
Cleansing Flame wiped ~12 of the Boyz while 6 more were killed by Purifier attacks after Coteaz' Hammerhand. All the Purifiers were wiped out however, but Coteaz survived and struck out, killing a Warbuggy. The Warbuggies fled the combat but got away as the Boyz held.
Turn 3-4
The OXI led her unit into the terrain to assault the Boyz. The Chimera near the action moved back full pace and popped smoke. Everything else just redeployed and then opened fire on the middle Boyz unit, killing 14 in total. In the assault 3 Purifiers were killed however the Boyz were wiped out.
In the other assault Coteaz fell and the Boyz consolidated toward a Razorback.
The Boyz that killed Coteaz surrounded the Razorback nearby. The rest of the Boyz moved toward the OXI's unit. The Warbuggies failed to rally and fled the table.
Alex declared the Waagh and the Boyz could now easily assault the Purifiers. In the ensuing fight all the Purifiers were wiped out as were all the Boyz (both units) leaving the OXI as the sole survivor of that combat. The other unit of Boyz blew up the Razorback exposing the Strikes inside.
With only two Boyz left in the entire army my army just shot them dead in turn 4 and won the game with a clear victory.
Conclusions
Well no illusions, Orks weren't ever going to do well against Purifiers. Taking out his AT after getting the initiative was important and meant that Claws were needed for AT duty. Of course with two units of Purifiers running around his army those Claws were more than a little busy.
That victory got me a 19-1 (15VPs short of 20-0) and shot me up the table 2 to play Kieran Waters' Space Wolves. Game 2 was Capture and Control Dawn of War. I had played Kieran once before at the summer Conclave with my Eldar in the same sort of mission and got a draw so I was confident for this one. His list had changed a lot since then however.
I was relieved to see no Long Fangs there but the unit of Thunderwolf Cavalry could be scary. I won the roll off and went with it. I deployed some Strikes in their Razorback in the ruins to the east where my objective while he did the same on the opposite side with some Grey Hunters. The Wolf Priest gave the Wolf Guard Preferred Enemy (Infantry) while the Joks gave my big unit extra armour save, and the small unit extra range. Kieran failed to seize.
Turn 1
I cast Warp Quake with the Strikes and then rolled the rest of the army on, failing to spot the Rhino with my Dread in the east.
Kieran's army rolled on with his Dread dropping midfield out of Warp Quake range. His Grey Hunters advanced while the rest of the army positioned.
The Dread spotted the Vindicare unfortunately and without cover he died.
Turn 2
Seeing as he had focused his army in the east, I put up the three Warp Quakes and then started heading east.
A Dread blew up the Rhino, pinning the Grey Hunters, and for the lack of anything better to do the Purifiers in the Rhino shot at them and killed one. The western most forces wrecked the Drop Pod while the more central forces destroyed the Ven Dread's Assault Cannon and Stunned him. The last Dread in my army shot at the Land Raider then, destroying the Assault Cannon.
Warp Quake finally paid off as the other Drop Pod came in and scattered within range, sendig it right back up into reserve. The Land Raider, Land Speeders and Thunderwolf Cavalry all rolled forward. The Land Speeders both shot at the Dread in the corner but missed.
Turn 3
Turn 3 is usually a good turn for me as some of you might have noticed throughout my reports, and this was no different. I put up two Warp Quakes (failing the eastern-most one) and kept rolling the western forces eastward. I moved a Chimera with the longer ranged Henchmen 6" forward to be within 12" of the Redeemer and let rip.
The Meltaguns from the back of the Chimera managed to blow up the Redeemer while the Chimera itself blew up a Land Speeder. A Heavy Bolters blew up the other Land Speeder and everything else in range shot at the Wolves, killing one and wounding the Lord. The rest shot at the now disembarked Wolf Guard or ran.
Still all that did was piss the Space Wolves off, and so they ran at me. The Thunderwolf Cavalry pelted at my objective and made it, assaulting the Razorback there. The Ven Dread also Shook my Chimera with its Heavy Flamer before charging it. The Wolf Guard tried to get in there also but rolled bad terrain rolls. The Vindicator also moved out to get shots.
Note the Drop Pod didn't come down this turn.
The Vindicator was the only shooting, shooting at the Chimera but scattering and thus only Stunning it. In the assault the Ven Dread penetrated the Chimera's hull twice but luck was on my side and it only rip off both weapons. Similarly, the Wolves only managed to Stun my Razorback.
Turn 4
I continue my trek eastward (after once again putting up Warp Quakes) with both Henchmen units getting out. The Razorback put up a successful Fortitude before the Strikes got out the back and moved toward the cavalry. The OXI's Purifiers followed suit. Both vehicles then moved out of the way, with the Rhino popping smoke so as to make sure it survived for the next turn's dash across the table.
The small unit of Henchmen had some successful shooting, taking down 2 Wolf Guard with a Dread taking down one more. The other Henchmen unit combined with another Dread also managed to wreck the Ven Dread.
Meanwhile the Purifiers and Strikes assaulted the cavalry, killing one, the Lord, and the wolf, losing 2 Strikes in the process. The last man stood.
The Grey Hunters began the retreat to the objective as disaster strikes; the Drop Pod comes down hoping to land on the Space Wolf objective instead of risking Warp Quake but scatters off the board allowing me to promptly place it in the North-West corner of the board where the unit will play no part in the game. The Vindicator continues to move around to fire, and the Wolf Guard shoot and assault the Henchmen.
The Vindicator is once again the only true shooting and it takes out both the large Henchmen squad and destroys the Multi-Laser of their Chimera. The Wolf Guard easily wipe out the Henchmen in combat and consolidate into the Redeemer's wreck, however the lone cavalry man gets cut down.
Turn 5-6
I don't bother with Warp Quakes anymore obviously and begin crossing the board to contest. The Purifiers and OXI enter their Rhino once again and trundle over the wreck before them, as does the western Chimera, while the other Chimera tank shocks through the Wolf Guard and Redeemer wreck. The remainder of the army moves to shoot...
...and shoot they do wiping out the Vindicator, the Wolf Priest, and the Wolf Guard.
All the Space Wolves could do is move both units of Grey Hunters toward their objective and hope the game ended, however it went on to turn 6.
Turn 6 ended simply as the Rhino tank shocked the Grey Hunters on the objective and they fled the table, so we called it there, as neither of us though any more victory points would be had out of it.
Conclusions
That was a tougher game alright, but it was obvious that luck was on my side, considering Kieran's awful damage rolls and the two mishaps. The Thunderwolf Cavalry almost cost me, as the plan was to roll out in turn 4, but they had to be dealt with in turn 4 unfortunately.
Well cest 'le vie and all that jazz. That victory was another 19-1 which put me up to table 1 for the final game against an awesome White Scars army. The army was commanded by Saoirse Bryne and was beautifully painted in the White Scars colours with the iconography to be had. The list wasn't optimised but had potential.
The mission was Seize Ground (4) Spearhead. Saoirse played a good gambit here, allowing the objectives to be set up in corners, and then after winning the roll-off for deployment picked the corners for deployment that had no objectives in them, thereby forcing me to split up my forces and allowing his force to fully utilise its superior mobility.
Note I rolled extra range for both Henchmen units. I also stole the initiative once again thanks to Coteaz.
Turn 1
I moved out the OXIs unit and a unit of Strikes toward the objective while I spread out my other vehicles. The Vindicare penetrated the Land Raider but only managed to blow off the Assault Cannon. One Dread managed to Immobolise and Stun the Command Razorback while a combination of other shooting wiped out three bikes.
All of the bikes moved toward the Vindicare, the smaller unit turbo-boosting around the back of the ruins. The Ven Dread also ran in that direction. The Redeemer swung out eastward toward the objectives while the Razorback repositioned.
The Razorback proved effective as it blew up a Dread with a single Lascannon shot. The bikes also forced the Vindicare to ground (needlessly as it would turn out), taking a wound from him.
Turn 2
Coteaz led a small force westward to combat the bikes while the OXI continued north. All shooting managed this turn was to Immobolise the second Razorback and once again Stun the Command Razorback.
The smaller Bike unit swung around the back of the ruins and killed the Vindicare. The larger unit came east and wrecked Coteaz' Rhino. The Redeemer continued east and the Razorback once again proved its worth, wrecking another Dread.
Turn 3
The eastern Chimera tried rolling over the crater but blew a track and got stuck. The Henchmen thus were forced to bail out in order to get to the Redeemer. The Strikes in the south made way to the center objective while the Chimera with them swung around the wreck of Coteaz' Rhino. Meanwhile, Coteaz himself led a charge into the Bike unit with the Captain.
Shooting was a bit better this turn, with a Razorback getting blown up. Coteaz' charge was rather successful, wiping out the Bikes and wounding the Captain, though 3 Purifiers died along the way.
The Chapter Master was now eager to call down the Orbital Bombardment so his unit disembarked so he could get the aid he seeked next turn. The Tac Squad moved toward the objective while the Redeemer moved to flame the Henchmen.
The Ven Dread fired its Multi-Melta at the Chimera and Immobolised it. The Command Razorback fired a shot at the advancing Strikes in the east and blew up their ride. Meanwhile the Redeemer tried to flame the Henchmen but only managed to kill the Jokaero. In the assault two more Purifiers fell but Coteaz managed to crack the Captain's skull with his Hammer.
Turn 4
The Grey Knights made some big move this turn. The Strikes in the center disembarked and Coteaz joined them, the last Purifier moving alone into the safety of the ruins. The Purifiers with the OXI got out and along with the Henchmen surrounded the Land Raider. Their Rhino then moved around the front of the ruins. The Strikes followed up, ready to jump on the objective next turn.
Despite 3 Meltaguns, 3 Psycannon shots and then 3 strikes of a S10 Hammer, the Land Raider only lost its Flamestorm Cannons. The Strikes and Coteaz managed to fell a Marine and their Razorback blew up the Command Razorback.
The Redeemer backed out of the circle of enemies and released its cargo, who promptly charged the Purifiers. The Tacs moved onto their objective and the Ven Dread repositioned for a side shot. The Orbital Bombardment was called down but scattered off target. Other shooting was also useless. In the assault, the Terminators were hit with a daze as the OXI dropped her Psychotroke Grenades on them, making them initiative 1. As such 3 of them were wiped out before they could strike, and though the remaining two got to kill 4 Purifiers, the Hammer killed them both, allowing the remainder of the unit to consolidate near the objective.
Turn 5
I moved the Strikes to the objective on the first floor of the ruins so the Land Raider couldn't Tank Shock me should I fail to stop it. Coteaz led his Strikes onto the central objective while his Razorback and the OXI's Rhino moved to contest in the north. The lone Purifiers in the middle moved out to slow down the Ven Dread. The other Strikes moved to contest also.
The Chimera's crew shot 4 Meltas at the Ven Dread but only destroyed its close combat weapon. A massed hail of shooting wiped out the Tac Squad and the Henchmen in the east Immobolised the Land Raider. In the assault the Purifier only managed to Stun the Ven Dread.
The Command Squad moved out and ran toward the objective. Shooting was ineffective and so the assault came quick. However I made my one mistake here and went for Hammerhand to try and kill the Ven Dread instead of just trying to hold him up, and as a result I Perils'ed and the Ven Dread was able to consolidate to contest the central objective and tie the game.
Conclusions
That was some intense game. The ending was amusing, if ever-so-slightly disappointing. I think Saorise played a good game and his only mistake in my mind was moving the Captain's Bike Squad in assault range of Coteaz and friends. Early on the trouble with the Land Raider made me doubtful about the outcome and indeed it took the whole game just to Immobolise it. To those who say a Land Raider is no good once Melta is on the table, let this tell you otherwise.
Anyway, despite the tie, I got a 12-8 for that game, and with 50 out of 60 points managed to win the tournament, with Saoirse coming 3rd, with Luke Osbourne from one of the earlier practice games coming 2nd. It was a great craic and I was very pleased with the list. My next endeavour is going to be King Kon, my first ever 2500pts tournament, so expect to see a list for that online in the weeks to come.
As promised in my last post, I have two battle reports here for you from two practice games I had during the week in preparation for the coming Conclave II. One was against James Carey's Chaos Space Marines and the other against Luke Osbourne's Grey Knights.
So for game 1 Wednesday night I faced James Carey's Chaos Space Marines. I was confident going into the game as Chaos really don't match up well against Grey Knights. Furthermore we rolled Spearhead deployment Capture and Control, a set-up ht suits my army quite nicely. James' list is below.
My main concern here was the mass of Terminators, however this was partially calmed when one of the Henchmen units (the smaller one) rolled extra 12" from the Jokaero's upgrade (though the other unit got nothing, despite rolling a 6 first). I won the roll off and deployed in the corner with the most terrain. There was a large Shrine of the Aquila on the other side of the board from the one I wanted and had I picked the other corner James would have been able to use that to advance with very little fire on him.
I deployed vehicles in pairs with a supporting Dread so as to give cover to each other. James deployed everything, choosing not to Deep Strike over Warp Quake. He layered up the Terminators and Obliterators, putting most one behind the other so as to provide cover to all but the Tzeentch guys (who didn't need it). The rest of the army went in or behind the Shrine. My Vindicare deployed in a forest where he could get clear shots into the Shrine. James tried to seize but failed.
Turn 1
My only movement was redeployment of vehicles of popping of some smoke to give most of my mech cover saves. I made a bunch of shots but only managed to kill an Obliterator, and Stun, Weapon Destroy, and Immobolise the Nurgle Rhino.
Most of James' army advanced, with two units of Oblits, the Terminators and the Daemon Prince swinging up the left flank with the Slannesh Rhino encased in among them. The Plague Marines got out and made some good terrain and run rolls to get up one level of the Shrine while the lone Obliterator up there moved forward.
The Thousand Sons made a beeline east, disembarking and shooting the crap out of the Vindicare. He survived the Bolters but the Bolt of Change burned him alive. The Tzeentch Terminator unloaded their Combi-Plasma into the lead Razorback but only Shook it.
Turn 2
I made even less movements than last time, pulling the same tricks to provide cover for most of my vehicles. The lead Razorback had an amusing moment casting Fortitude to get rid of its Shaken result, and though it passed, it rolled snake eyes for the pass, getting Immobolised by the Perils glance.
Shooting was not much better this turn, with the Nurgle Rhino getting wrecked, the lone Obliterator getting smoked, and a Tzeentch Terminator getting flattened.
The Chaos forces continued their advance, with the western forces moving onward, while the Plague Marines climbed to the top of the Shrine and the Thousand Sons embarked again and went on the move.
A failed Bolt of Change attempt at my Rhino started the shooting phase. Though one unit of Oblits just couldn't hurt the Immobolised Razorback, the other managed to wreck a Dread.
Turn 3
I went on the offensive this turn, determined to get the Terminators into some deep trouble, while also sending a force out toward the Chaos objective. A Strike Squad also debussed to help out.
Shooting was impressive with everything near my objective (bar the Dread) shooting at the Tzeentch Terminators and wiping them out (Meltas are awesome). Meanwhile the Dread took out another Oblit while the advancing forces failed to do damage to the Tzeentch Rhino.
With the Tzeentch Terminators taken out I was happy to give something back in order to get the Slaanesh Terminators in alone against my home forces. They and the Daemon Prince came in toward my Strikes and Henchmen, while the Marines and Oblits moved in mid-table. The Thousand Sons swung in by my advance force, hoping to blow me away after an Oblit took out a transport.
However this didn't happen and Bolt of Change even failed. The two man Oblit unit managed to pop the Chimera (the Henchmen passed their test) while the Slaanesh Terminators charged and shredded the Razorback. The Plague Marines however killed two Strikes.
Turn 4
I swung a Razorback far north to try going around the Shrine to the objective (didn't want to get in Melta range of the Oblits). The Purifiers disembarked and prepared for the charge while the Chimera moved up and the guys inside blew up the Chimera, killing a Purifier and two Thousand Sons in the blast. The hurt Strike Squad moved into the ruins next to the objective to stay safen while their ride repositoned.
Down south, the Henchmen claimed into the wreck of the Razorback while the Strikes circled around the Terminators. Both units opened up and the combination of Meltas and S5 fire brought the unit to one man, who was killed in assault. The Dreads tried at Oblits but only one died. The Purifiers charged the Thousand Sons, and despite getting double Hammerhand (which I realise now was an unnecessary risk thanks to the Rad Grenades) only killed 3 of them, while 2 Purifiers fell in return.
The Slaanesh Rhino came over the crashed Aquila Lander in the centre of the board and debussed its guys, while the Daemon Prince came down south, ready for the kill. Note he hadn't been doing nothing this whole time, just Reinforced Aegis was ensuring his Bolts did nothing. The Oblits continued a steady advance.
The Oblits fried Multi-Meltas at the advancing Razorback but to no avail, however this was evened out when the Marines took out an entire Strike Squad in one round of shooting. The Prince attacked the Henchmen and easily wiped them out. In the ongoing combat two more Purifiers were killed for only one Thousand Son in return, with the Inquisitor taking a wound from Fearless saves.
Turn 5
I debussed Coteaz and friends and moved them toward the Daemon Prince. The Dread nearby moved toward the Marines, since without a Fist he could reliably tie them up for awhile and stop them taking or contesting my objective. The Razorback continued on north while the Rhino moved up to pick up the Purifiers should they survive.
The Dread fired at the Marines and killed one only somehow. The other fired at the Oblits but failed to hurt any. The Purifiers shot everything at the Daemon Prince and managed a wound. The assault was moved effective, however despite Psyk-Out Grenades, the Prince held on with one wound from the Halberd attacks and got to strike simultaineously with the Hammer and Coteaz killing 3 Purifiers as Coteaz bashed his skull in. The Dread faired well also against the Marines, killing one for no damage in return. The last Purifiers cut down one Thousand Son before the Sorcerer killed him, leaving the Inquisitor alone in combat though she held on.
(Note I forgot to fire my Meltas at the Obliterator this turn, which is why it seems like the Chimera randomly advanced).
It was crunch time and the Rhino rammed my Razorback unsccessfully. The Oblits advanced and failed to damage the Chimera. The Plague Marines seemed to make a mistake here, maybe thinking the game was likely to go on and moved down to the bottom and toward the Razorback, firing at it and only losing a guy to Plasma, leaving the objective empty (though it had been for the whole game).
The last thing that happened in the game (it ended this turn) was the Inquisitor got pissed off and killed the last two Thousand Sons, surviving their simultaineous return attacks. The bitch was back!
Conclusions
That was a good game, however it was one-sided from the start to a degree to be fair; Grey Knights are not a good match-up for Chaos. James' mistake won me the game, however it was a gamble on the 66% chance that the game would end. It is the common crux of many 40k players though to forget the mission in the heat of blowing shit up.
That game gave me a 17-3 win that I was happy with. The list performed very well I thought though I didn't get to try a few things out (Warp Quake and Servo-Skulls namely). I knew learning the right time and place to debuss Strikes was something I had to learn, however this game didn't call for it much.
So with that done it was on to Thursday and my game with Luke Osbourne and his Heretical Space Wolf Wannabe Grey Knights (Grey Knights made from Space Wolf models). Luke ran a similar list to my own with the same sort of thing going on.
It was an intimidating list, so combined with the fact that we rolled Seize Ground (5) Pitched Battle, I was overly relieved to roll highest for both deployment and objectives. I placed my three with two in the south-west corner and the other out of the west flank, so Luke placed him dead center and in the ruins in the north-east.
I bunkered up near my objectives, planning to simply try holding the 3 I had near me while sending a small distraction force out toward his. With any luck I could hold them long enough to win (note I have never won Seize Ground before except once - against Luke ). I kept the vehicle pairing idea from the last game with supporting Dreads, sending a Rhino and Razorback with their respective squads out toward the east to put pressure on Luke's home objective (and the center). I placed my Skulls out in such a way that his Vindicare couldn't Infiltrate in any terrain that would also put him in range of my mech. Luke deployed in the opposite, afraid that by spliting his forces to hold both the home objective and go for mine that my first turn fire would be too devastating on him. He also held his Interceptors in reserve and chose to deploy the Vindicare as normal behind his Dreads (out of LOS though in the open).
Unfortunately then, despite my preparations just incase, Luke seized.
Forgot to mention, my small Henchmen squad rolled a 5+ invulnerable save, while the larger unit got Rending.
Turn 1
Luke debussed some Henchmen and ran them behind a wall in range of his objective and then he advanced everything in a parking lot like fashion to provide cover. Combined Assault Cannon and Heavy Bolter fire killed my Vindicare who I had Infiltrated not far out of my deployment zone. He also managed to drop a Dread with the Vindicare, shake another with his Dread, and use his other to pop a Rhino.
The Dread passed his Fortitude test. The now debussed Coteaz and friends ran behind the hill (it was quite large and blocked LOS to infantry easily enough). The central Dread moved back west to claim the place of the fallen one. A Strike Squad debussed and moved up the ruins to claim one of my objectives. Nearby a Razorback moved for both cover and firing lanes.
I managed to run a pretty successful turn of shooting, Immobolising a Rhino and a Psyfleman and dropping the gun from a Psyback. I also managed to blow up the Assman Dread.
Turn 2
Luke's Interceptors came on, and fearing the amount of firepower I could bring to bear on them this early on, deployed behind his army near his objective and advanced with them as they continued. He failed to match the previous turns round of shooting, only knocking the weapon from a Razorback and Dread, and Shaking the latter.
With its weapon gone the eastern most Razorback let it guys debus into the ruins before hiding behind them itself. The Dread lined up to Luke's lead Dread and that was all.
The Dread started calling it and blowing up Luke's lead Dread. The recently debussed Strikes managed to Immobolise the second Rhinos, messing up the eastern advance, while last turn's debussed Strikes Immobolised an Assback. Coteaz and friends shot at the damaged Razorback and wrecked it, pinning the Acolytes that came out. The two Joks also managed to destroy the Assault Cannon on the other Assback. All in all an excellent turn of shooting, shutting down a lot of Luke's mobility.
Turn 3
With Immobolised vehicles now blocking his LOS the Vindicare hoped in the empty Pysback and it moved. All of the Purifiers debussed and the Interceptors moved up to meet them.
The Dread opened up on my western Dread and destroyed it, while the Purifiers and Interceptors combined with the Chimera to wipe out both the Strike Squad and their Razorback.
I decided to start toward the western objective now that the Dreads were mostly cleared out, and so sent a unit of Purifiers in their Rhino (with the OXI) toward it to try and keep it safe so as not to risk a scoring unit so early. The last of the Strikes debussed into the ruins as their ride switcheroo'ed with the other Pysback for cover and shots. Meanwhile the Dread, Coteaz and friends all moved back westward to get away from the easts heavy enemy presence (and dakka).
I did a bunch of shooting but managed a very miserable turn, only getting rid of the last Assault Cannon.
Turn 4
With most of the central vehicles either Immobolised or stuck because of Immobolised vehicles, everything debussed and moved toward the terrain. The Purifiers and Interceptors joined them while the Henchmen debussed and ran in too so as to give the ther Purifiers their ride (which advanced with the Chimera). Hoping to stay in the game the Dread moved back so the Joks could no longer draw a bead to it. The Vindicare got back out now that firing lanes had once again opened up (or were about to).
The Henchmen who were pinned last turn moved and shot at the Purifiers, killing none, however combined fire from the Strikes killed two. Thankfully everything else either failed in the same attempt or failed against my Dread.
With the enemy so close the Razorback swung around the ruins and Cotez and friends got in to safety, popping smoke. The other Razorback and Dread moved for firing spots. The Rhino moved further into the objective while the Chimera started to move out cautiously.
The Psyback managed to draw a bead at the Chimera's side armour, and even with cover, managed to Shake it, blow off its Multi-Laser, and Immobolise it, basically taking the Servitors out of the game. The Dread has similar luck, knocking both arms off the enemy Dread, effectively neutralising him. The only other shooting casualties were one of the Henchmen squads.
Turn 5
It was now crunch time and Luke found himself in a bit of a pickle; as he explained it, he couldn't yet shunt with the Interceptors as no matter which of my objectives they went for, they would be killed in my subsequent turn from mass shooting and possibly multi-charges, so he needed to try wipe out or whittle down some of my holding troops in this turn and hope the game goes on.
So the Strikes both moved in on the objective along with the Purifiers, Coteaz, and a Henchmen squad. The Interceptors then jumped into the space between the wreck and the Immobolised parking lot. His Dread moved to try and contest to western objective next turn (if there was one).
The Vindicare started, unable to see the Dread or Coteaz' Rhino, he settled for the OXI's Rhino and blew it up spectactularly despite cover. One Purifier died in the blast. Everything else was unloaded into Coteaz' Razorback, and since it was only wrecked and not blown up, the Strike Squad on the balcony, with a single Striker survivng and passing his test.
I moved the Chimera up now to claim the objective with the Dread and Interceptors my targets for this (hopefully last) turn. The lone Strike moved into hiding while the larger squad in the ruins took his place, and Coteaz and friends took theirs. The other Razorback then moved back home.
Shooting was apt in that I managed to clean up some points, destroying the Dread and an Assback, killing half of the Interceptors, and killing one of the Henchmen causing them to flee.
With that we rolled and the game ended, 3-2 to the Grey Knights (the real ones ).
Conclusions
That was a fun and tough game. I got off to a bad start however I clawed it back efficiently with the plan working pretty much to a tee. List wise I am loving it. I know the Henchmen did little that game, however with how little they cost, their potential, and the fact that it is to be expected, I am ok with that; some games they just will be a scoring crappy Lascannon battery. I am particularly loving the S5 fire, as it puts on extra pressure and it helped me open up a good few things in that game; indeed some glances on AV11 from Storm Psybolters turned the tied in a few rounds.
I am pleased that I finally won a 5 objective mission as it is my weakest mission without a doubt (or at least was; this list handles it better than my old list(s)). I have noticed also that the list is easy to learn to use, and the feel is one of good synergy, so I am happy with that two.
That game was a 15-5. So with two wins so far with the list I am set and ready for Conclave on Saturday. Wish us luck.


 ). I kept the vehicle pairing idea from the last game with supporting Dreads, sending a Rhino and Razorback with their respective squads out toward the east to put pressure on Luke's home objective (and the center). I placed my Skulls out in such a way that his Vindicare couldn't Infiltrate in any terrain that would also put him in range of my mech. Luke deployed in the opposite, afraid that by spliting his forces to hold both the home objective and go for mine that my first turn fire would be too devastating on him. He also held his Interceptors in reserve and chose to deploy the Vindicare as normal behind his Dreads (out of LOS though in the open).


 ).
).